Imagine that first whiff of cocoa and sweet yeast—it’s pure kitchen magic. I’ve spent ages perfecting the dough until I finally landed onThe Best Red Velvet Cinnamon Rollsrecipe.
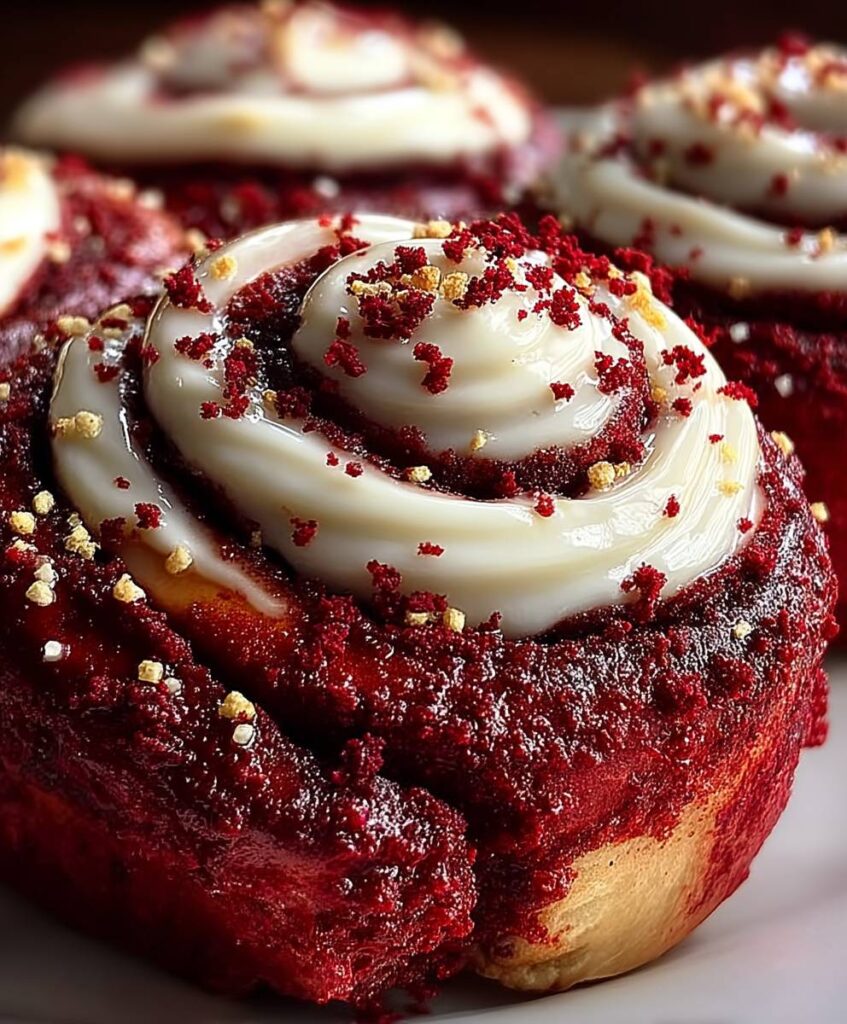
Forget dry, sad spirals; these are moist, fluffy, boast a brilliant crimson swirl, and are topped with rich cream cheese frosting that melts right in.
- This recipe simplifies the daunting yeast process, ensuring a soft, cloud-like texture even for novice bakers taking on a roll challenge.
- Experience a deep cocoa background perfectly balanced by the tangy cream cheese glaze, making every single bite unforgettable and rich.
- The stunning, vibrant ruby-red color and beautiful spiral appeal make these rolls the centerpiece of any holiday breakfast or brunch table.
- Serve these delicious treats warm for a decadent dessert or cool for a unique, sophisticated afternoon coffee accompaniment.
The Culinary Comedy of Yeast: My Quest for Perfection
I must confess, my journey to creating the ultimate red velvet rolls was less “master baker” and more “kitchen catastrophe.” My initial attempts resulted in rolls so dense, they could double as doorstops, and so pale, they looked like standard, slightly embarrassed buns. I treated yeast like a temperamental teenager, unsure if I needed to coddle it or strictly enforce the rules. After numerous failures involving sticky floors and scorched bottoms—we all have those baking moments—I realized the secret wasn’t just in the cocoa, but in the technique and the quality of the ingredients themselves. This recipe is the culmination of those hilarious, flour-dusted trials, guaranteeing you a soft, springy dough that behaves exactly as it should. We are focusing on maximizing that dramatic contrast: the pillowy, ruby-red interior against the thick, snow-white cloud of frosting.
Many classic recipes rely on excessive food coloring, but true red velvet gets its depth from a subtle interaction between the acid (buttermilk or vinegar) and the natural, non-alkalized cocoa powder. This reaction helps maintain the dough’s tenderness and contributes to that beautiful, deep crimson hue. We balance that tangy complexity with just the right amount of sugar and fat to ensure these rolls remain decadently moist without becoming heavy. AchievingThe Best Red Velvet Cinnamon Rollsmeans mastering the roll-up process, ensuring an even spiral that bakes perfectly without any dry edges. Grab your apron; we are diving into a recipe that will finally make your stand mixer sing rather than weep quietly into a bowl of failed dough.
The Science Behind the Crimson Swirl
Why exactly does red velvet taste different from chocolate? It’s not merely food coloring; it’s the specific mixture of vinegar and buttermilk (or an acidic alternative) that reacts with the natural cocoa. This acid reduces the reddish pigments in the cocoa powder, enhances the cake’s tenderness, and creates a subtle tanginess that truly defines the flavor profile. If you skip the acid, you just end up with light chocolate rolls. For the filling, we skip traditional, dry spice mixes and use a creamy, decadent blend of butter, brown sugar, and a touch of vanilla bean paste to enhance the moist texture. This richness prevents the cinnamon from becoming overwhelming and complements the cocoa undertones beautifully. Understanding this balance is the key to creating a truly spectacular version of this iconic dessert, elevating it far beyond a simple breakfast pastry.
Another crucial step is ensuring the butter in both the dough and the filling is at the perfect temperature. For the dough, softened butter ensures even distribution and softness. For the filling, you need firm, yet spreadable, butter to prevent it from leaking out during the second proofing stage. If the butter is too warm, the filling oozes out, leading to burnt bottoms and a dry interior. If it’s too cold, you tear the dough while spreading. Aim for that sweet spot—butter that yields easily to pressure but holds its shape. Getting this texture right ensures that when you slice those magnificent ruby-red swirl buns, every roll maintains its integrity, ready for its close-up and, more importantly, ready for consumption.
Ingredients for The Best Red Velvet Cinnamon Rolls
Here’s what you’ll need to make this delicious dish:
- All-Purpose FlourUse a high-quality brand to ensure proper gluten development, resulting in light and airy rolls.
- Active Dry YeastEssential for lift; make sure your yeast is fresh and proofed correctly in warm milk, not hot, to ensure viability.
- Granulated SugarProvides food for the yeast and sweetness for the dough; a small amount helps activate the proofing process.
- ButtermilkThe critical acidic component that interacts with the cocoa powder and tenderizes the dough, yielding a superior texture.
- Unsalted ButterUsed both in the dough and the filling; ensure it is softened but not melted for best incorporation.
- Natural Cocoa PowderMust be non-alkalized (not Dutch process) to achieve the necessary chemical reaction for the red color and flavor depth.
- Red Food Coloring GelWhile the cocoa helps, a concentrated red gel ensures that show-stopping, vibrant crimson hue.
- Cream CheeseThe base for the rich, tangy frosting; use full-fat cream cheese softened to room temperature for a smooth consistency.
- Powdered SugarUsed for the perfect glaze texture; sift this sugar to prevent lumps in your finished cream cheese frosting.
The full ingredients list, including measurements, is provided in the recipe card directly below.
How to Make The Best Red Velvet Cinnamon Rolls
Follow these simple steps to prepare this delicious dish:
- Step 1: Activate the Yeast and Prepare the Dough BaseWarm the milk gently until it reaches 105–115°F (40–46°C); too hot will kill the yeast. Dissolve the yeast and a pinch of sugar in the warm milk and let it sit for about 5 to 10 minutes until frothy. In a large mixing bowl, combine the flour, remaining sugar, salt, cocoa powder, buttermilk, melted butter, and the yeast mixture, then add the red food coloring gel.
- Step 2: Knead and First RiseKnead the dough using a stand mixer with a dough hook attachment for 6 to 8 minutes until it is smooth and elastic. The dough should be slightly tacky but not sticky. Place the dough in a lightly oiled bowl, turning once to coat, and cover it loosely with plastic wrap. Let it rise in a warm, draft-free spot for 60 to 90 minutes, or until it has doubled in size.
- Step 3: Roll, Fill, and Slice the RollsPunch down the risen dough gently and turn it out onto a lightly floured surface. Roll the dough into a large rectangle approximately 18 x 12 inches. Prepare the filling by creaming together the softened butter, brown sugar, cinnamon, and a dash of vanilla. Spread the filling evenly over the dough, leaving a small margin bare on one long edge. Tightly roll the dough along the long edge, then slice the roll into 12 equal pieces using unscented dental floss or a very sharp knife.
- Step 4: Second Proof and BakingArrange the rolls in a greased 9×13 inch baking dish, ensuring they are slightly touching. Cover the pan and let the rolls proof again for 30 to 45 minutes until they look slightly puffy. Preheat your oven to 375°F (190°C) while the rolls proof. Bake the rolls for 20 to 25 minutes, or until the tops are set and the rolls are baked through.
- Step 5: Prepare and Apply the Cream Cheese FrostingWhile the rolls cool slightly, beat the softened cream cheese and butter together until completely smooth. Gradually mix in the powdered sugar and vanilla bean paste until the frosting is thick and creamy. Once the rolls are warm (not piping hot), slather that glorious frosting generously over the entire batch, allowing it to melt slightly into the cracks.
Transfer to plates and drizzle with extra frosting for the perfect finishing touch, serving them immediately while they are delightfully gooey.
Troubleshooting Common Red Velvet Dough Drama
My Dough Didn’t Rise: The Case of the Lazy Yeast
The most common culprit for flat, dense cinnamon rolls is improperly proofed yeast. Remember, yeast is alive, and it prefers a cozy, medium temperature, not a boiling hot bath or a freezing cold draft. If your milk was too hot (above 120°F or 49°C), you likely killed your little helpers. If the milk was too cold, they simply went dormant. Another factor is old yeast. If your yeast doesn’t foam up within 10 minutes during Step 1, toss it and start over with a fresh packet; there is no recovering dead yeast. Ensure your rising spot is consistently warm. Placing the covered bowl inside an oven that is turned off, with only the light on, often provides the perfect environment for a rapid, successful rise.
The Filling Leaked Out During Baking
This is often a temperature issue. If the butter in your filling was too soft when you spread it, or if your second proofing session was too warm, the butter melts prematurely, pooling at the bottom of the pan and causing dryness. To combat this, ensure the filling butter is truly just softened—firm enough to hold shape. After slicing the rolls, if your kitchen is very warm, consider placing the baking dish in the refrigerator for 10 minutes before the second proofing, just to chill the butter slightly and firm up the rolls before they hit the oven heat. This simple trick locks in that flavor and prevents a messy butter puddle.
Making Ahead and Storage Secrets
One of the best features of this Ultimate Red Velvet Rolls recipe is its flexibility for make-ahead preparation. You can prepare the entire batch up through Step 3, arranging the sliced rolls in the baking dish. Instead of doing the second rise immediately, cover the dish tightly with plastic wrap and refrigerate it for up to 12 hours. This slow, cold proofing develops even deeper flavors. The next morning, simply pull the dish out of the refrigerator and let it sit on the counter for about 90 minutes to warm up and finish the second rise before baking as directed in Step 4. This ensures you wake up to fresh, warm, impressive pastries without the early morning kneading session.
If you somehow end up with leftovers—a scenario I find highly unlikely—store them in an airtight container at room temperature for up to three days, though they are always best on day one. If you must reheat them, a quick 10-second blast in the microwave revitalizes the dough and melts the frosting back into that beautiful, gooey consistency. Trust me, nobody wants a cold, sad roll. Always reheat these crimson delights before serving again to bring back that bakery-fresh softness and aroma.
Frequently Asked Questions About Red Velvet Cinnamon Rolls
Can I substitute the buttermilk?
Yes, you can easily create a substitute by adding one tablespoon of white vinegar or lemon juice to a measuring cup and filling the rest with regular milk, letting it sit for five minutes before incorporating it into the dough. However, the texture achieved with real buttermilk is truly superior for this specific recipe.
How do I get a brighter red color?
Use a high-quality, concentrated red food coloring gel (not liquid drops). Gels provide maximum color depth without adding excess moisture to the dough, ensuring that beautiful, brilliant crimson shade remains vibrant after baking.
Can I freeze the dough?
Absolutely! You can freeze the rolls after slicing (Step 3). Place them on a baking sheet to freeze individually, then transfer them to a freezer bag. When ready to bake, thaw them overnight in the refrigerator, then let them rise at room temperature before baking as usual.
The Quest for the Perfect Swirl
There are cinnamon rolls, and then there areThe Best Red Velvet Cinnamon Rolls. I spent three years searching for a recipe that truly lived up to the name—a quest filled with disastrously purple dough, rolls that stubbornly refused to rise, and frostings that tasted suspiciously like shoe polish. I needed that perfect balance: moist, fluffy, a deep ruby red, and absolutely drenched in tangy, irresistible cream cheese frosting.
The turning point arrived during a particularly rainy Tuesday, fueled by stubbornness and an excessive amount of cocoa powder. We cracked the code. This recipe is not just about dessert; it’s about a feeling—the sheer joy of pulling a tray of gorgeous, deep-crimson swirls from the oven. Forget everything you thought you knew about cinnamon rolls. These are richer, softer, and possess a subtle, chocolatey tang that elevates them from simple breakfast pastry to full-blown culinary royalty.
Unveiling the Magic: Why These Rolls Reign Supreme
What makes these specific red velvet swirls stand head and shoulders above the rest? It’s the texture, primarily. We use a combination of buttermilk (or a cultured dairy alternative) and vinegar in the dough, which reacts with the baking soda and cocoa powder, intensifying the color and creating an unbelievably tender crumb. The result is a roll that practically melts in your mouth, resisting the dryness that plagues lesser baked goods.
We skip the traditional cinnamon roll glaze and opt for a high-quality cream cheese frosting that is generously applied while the rolls are still warm. This allows the frosting to seep into every nook and cranny, creating a decadent, moist environment. Preparing these beautiful, vibrant rolls takes time, mostly due to the rising process, but the payoff is monumental. Gather your ingredients, prepare for your kitchen to smell like pure bliss, and get ready to bake the most impressive morning treat of your life.
Ingredients for Dough Perfection
- 3 cups all-purpose flour, plus extra for dusting
- 1 packet (2 1/4 teaspoons) active dry yeast
- 1/2 cup granulated sugar
- 1/2 teaspoon salt
- 1 cup warm buttermilk (or milk mixed with 1 tablespoon white vinegar)
- 1/4 cup unsalted butter, melted
- 1 large egg, room temperature
- 1 tablespoon unsweetened cocoa powder
- 2 teaspoons vanilla bean paste
- 2 tablespoons red food coloring (gel preferred for deep color)
The Classic Cinnamon and Brown Sugar Filling
- 1/2 cup unsalted butter, softened
- 1 cup light brown sugar, packed
- 2 tablespoons ground cinnamon
- 1/4 teaspoon fine sea salt
The Ultimate Cream Cheese Frosting
- 8 ounces full-fat cream cheese, softened
- 1/2 cup unsalted butter, softened
- 3 cups powdered sugar, sifted
- 1 teaspoon vanilla bean paste
- 1 tablespoon milk or heavy cream
Baking Bliss: Step-by-Step Guide
The success of these ruby-red rolls hinges on proper kneading and patient proofing. Do not rush the yeast; it is your friend and needs time to work its magic and develop those beautiful flavors.
Creating the Deep Red Dough
First, proof the yeast: In a large bowl or stand mixer, whisk the warm buttermilk, yeast, and a pinch of sugar. Let it sit for 5 to 10 minutes until foamy. If it doesn’t foam, your yeast is likely expired, and you need to start over. Into the foamy mixture, add the melted butter, egg, vanilla bean paste, red food coloring, and vinegar (if using). Mix until just combined.
In a separate bowl, whisk together the flour, cocoa powder, sugar, and salt. Gradually add the dry ingredients to the wet ingredients, mixing on low speed with a dough hook until the dough comes together. Knead for about 5 to 7 minutes until the dough is smooth and elastic. It should be slightly tacky but not overly sticky. Place the dough in a lightly oiled bowl, turning to coat. Cover with plastic wrap and let it rise in a warm spot for 1.5 to 2 hours, or until doubled in size.
Rolling, Cutting, and Baking
Once the dough has doubled, punch it down gently and turn it out onto a lightly floured surface. Roll the dough into a large rectangle, approximately 12 by 18 inches. Meanwhile, prepare the filling: Cream together the softened butter, brown sugar, cinnamon, and salt until smooth. Evenly spread the filling mixture over the entire surface of the dough rectangle, leaving about a half-inch border bare on one of the long edges.
Starting from the long edge opposite the bare border, tightly roll the dough into a log. Use a sharp knife or, even better, unflavored dental floss, to cut the log into 12 even slices. Arrange the slices cut-side up in a lightly greased 9×13 inch baking dish. Cover the dish and let the rolls proof for a second time for 30 to 45 minutes, allowing them to puff up and fill the pan. Preheat your oven to 375°F (190°C).
Bake the cinnamon rolls for 20 to 25 minutes, or until the edges are lightly golden brown and the centers are set. While the rolls bake, prepare the cream cheese frosting: Beat the cream cheese and butter until smooth. Gradually add the sifted powdered sugar, vanilla, and milk. Beat until light and fluffy. Immediately spread the frosting over the warm rolls. Allowing the rolls to absorb the frosting while hot is the secret to maximum moisture and flavor saturation.
Perfecting the Cooking Process

Always proof your yeast first to confirm it is active before mixing the dough; this prevents wasting ingredients. While the dough is completing its second rise, prepare the cream cheese frosting. This ensures the frosting is ready to be applied the moment the rolls come out of the oven, guaranteeing those soft, gooey results we all crave.
Add Your Touch
For an intense chocolate experience, swap half of the standard cocoa powder for Dutch-process cocoa. If you want textural contrast, add chopped pecans or walnuts to the filling mixture before rolling. For a citrusy twist on the frosting, replace half the vanilla bean paste with fresh lemon or lime zest.
Storing & Reheating
Store uneaten velvet swirls tightly covered at room temperature for up to two days, or refrigerated for up to five days. To reheat, microwave individual rolls for 15-20 seconds, or wrap the whole pan loosely in foil and bake at 300°F (150°C) for 10 minutes until warmed through and gooey again.
I once took a fresh batch of these ruby-red rolls to a neighborhood gathering, and an elderly gentleman declared them “the finest bakery item he’d had since 1952.” That level of validation confirmed that the effort behindThe Best Red Velvet Cinnamon Rollswas absolutely worth it.
Expert Advice for Flawless Results
- Use room-temperature ingredients, especially the egg and buttermilk, to help the dough rise faster and achieve a more uniform, tender texture.
- Measure your flour using the spoon-and-level method; too much flour results in dense, dry rolls that won’t absorb the delicious cream cheese frosting.
- Do not overbake the rolls; slightly underbaked centers are the key to gooey tenderness, so pull them out just before they look completely done.
Troubleshooting and FAQs
Baking with yeast can feel intimidating, but a little patience and attention to detail will ensure success. Don’t panic if your dough seems too sticky initially; a light dusting of flour during the rolling phase is perfectly acceptable.
The color intensity heavily relies on the quality and type of food coloring you use. Liquid food coloring often fades during baking. Always use a high-quality gel food coloring for that vibrant, deep-red velvet hue.
Absolutely! After cutting the rolls and placing them in the baking dish, cover tightly and refrigerate overnight. In the morning, let them sit at room temperature for 1 hour before baking as directed. This slow, cold proofing enhances the flavor beautifully.
This typically happens when the dough log wasn’t rolled tightly enough or when the second proofing was too long, causing the spirals to relax. Ensure you roll the log as tightly as possible before slicing, and don’t over-proof them before baking.
You can create a suitable substitute by pouring 1 tablespoon of white vinegar into a liquid measuring cup and filling the rest with milk until you reach 1 cup. Let it sit for five minutes until it curdles slightly. This acidity is essential for reacting with the cocoa and activating the coloring.
The Ultimate Weekend Treat
Whether you are looking to impress brunch guests or simply treat yourself to something truly spectacular, this recipe delivers on every front. The slight cocoa notes mingled with rich cinnamon and the luxurious texture of the dough make these rolls truly unforgettable. MakingThe Best Red Velvet Cinnamon Rollsis a commitment to decadence, and trust me, it’s a commitment you will never regret. These velvety beauties are perfect for holiday mornings or just because Tuesday needs a little more glamour. Enjoy the process, and prepare for a wave of compliments when you pull that perfectly crimson pan from the oven.
The visual appeal alone—the striking red against the bright white frosting—is enough to bring a smile to anyone’s face. They taste even better than they look, offering a moist, complex flavor profile that goes far beyond a standard cinnamon roll. Prepare a double batch; they disappear astonishingly quickly.
Conclusion for The Best Red Velvet Cinnamon Rolls
You have just mastered the art of creating a truly spectacular treat that combines the magic of cocoa and the warmth of spice. These aren’t just ordinary breakfast pastries; they are a deep, dark, cocoa-infused masterpiece, swirled with intense cinnamon filling and blanketed in tangy, sweet cream cheese frosting. Whether you serve The Best Red Velvet Cinnamon Rolls for a festive holiday brunch or a spontaneous Sunday morning indulgence, they promise comfort, decadence, and jaw-dropping presentation in every bite. Go ahead, bask in the glory of your baking skills. Now, make a strong cup of coffee and enjoy the fruits of your labor—you’ve certainly earned that sticky, glorious swirl.
Print
The Best Red Velvet Cinnamon Rolls
- Total Time: 35 minutes
- Yield: 4 servings
Description
Experience velvet decadence! These plush, deep crimson rolls feature a cocoa-infused dough that rises for 90 minutes for ultimate softness.
Ingredients
- All-purpose flour: 4 cups, plus more for dusting
- Active dry yeast: 2 1/4 teaspoons
- Whole milk, warmed: 1 cup
- Unsweetened cocoa powder: 1/4 cup (divided for dough and filling)
- Liquid red food coloring: 2 tablespoons
- Cream cheese, softened: 8 ounces
- Powdered sugar: 2 cups
- Ground cinnamon: 2 tablespoons
Instructions
- Step 1: Activate the yeast by dissolving it in the warmed milk; let sit for 5 minutes until foamy. In a large bowl, combine the flour, 2 tablespoons of cocoa powder, sugar, and salt. Add the yeast mixture, melted butter, buttermilk, and red food coloring. Mix well, then knead the dough on a lightly floured surface for 5-7 minutes until smooth and elastic. Place in a greased bowl, cover, and let rise in a warm place for 60-90 minutes until doubled in size.
- Step 2: While the dough rises, prepare the filling by combining the softened butter with brown sugar, ground cinnamon, and the remaining cocoa powder; set aside. Once the dough has doubled, punch it down and roll it out onto a lightly floured surface into a large rectangle, approximately 12×18 inches.
- Step 3: Spread the prepared red velvet cinnamon filling evenly over the surface of the dough, leaving a small 1-inch border on one of the long edges. Starting from the opposite long edge, roll the dough tightly into a log. Slice the log into 12-15 even pieces using a sharp knife or unflavored dental floss.
- Step 4: Arrange the cut rolls in a lightly greased 9×13-inch baking dish. Cover the dish loosely and allow the rolls to undergo a second proof for 30-45 minutes until slightly puffy. Preheat your oven to 375°F (190°C). Bake the rolls for 18-25 minutes, or until the edges are light golden brown and the centers are set.
- Step 5: While the rolls cool slightly, prepare the cream cheese frosting: beat the softened cream cheese and butter until smooth. Gradually add the powdered sugar and vanilla powder until the frosting is light and fluffy. Spread the generous layer of cream cheese frosting over the warm cinnamon rolls before serving.
Notes
- For optimal freshness, store frosted rolls sealed in the refrigerator for up to 5 days, or keep unfrosted rolls tightly wrapped at room temperature for 2 days.
- To revive day-old rolls, tent the whole pan in foil and reheat at 300°F (150°C) for 10 minutes to restore the gooey center and tender texture.
- Serve these rich rolls alongside a dark roast coffee or a small dollop of mascarpone cheese for an additional decadent touch.
- Use unflavored dental floss to slice the rolled dough log; this simple technique prevents squishing and ensures perfectly round, professional spirals.
- Prep Time: 15 minutes
- Cook Time: 20 minutes
- Method: Stovetop
- Cuisine: American
Nutrition
- Serving Size: 1 large cinnamon roll
- Calories: 580
- Sodium: 480mg
- Fat: 28g
- Saturated Fat: 17g
- Unsaturated Fat: *Note on Unsaturated Fat: Daily Value (%) is generally not established for Unsaturated Fat.
- Trans Fat: 0g
- Protein: 45g
FAQs
Why did my red velvet rolls turn brown instead of vibrant red?
The vibrant hue of these gorgeous rolls relies heavily on the quality of your cocoa powder and the chemical reaction with baking soda and acidic ingredients like vinegar or buttermilk. If your red food coloring isn’t high quality (gel is best!), the color might dull during baking. Ensure you use non-Dutched cocoa powder, as the processing of Dutched cocoa neutralizes the necessary acid. Don’t skip the vinegar—it ensures maximum color payoff for your beautiful red velvet baked goods, making sure they look as stunning as they taste.
Can I prepare the dough for The Best Red Velvet Cinnamon Rolls ahead of time?
Absolutely! Preparing the dough in advance makes breakfast baking a breeze, especially if you have an early start planned. After the first rise, punch the dough down gently, wrap it tightly in plastic wrap, and refrigerate it for up to 24 hours. The cold temperature slows down the yeast activity significantly, enhancing flavor development. When you are ready to bake these amazing Red Velvet Cinnamon Rolls, take the dough out, allow it to proof at room temperature for about 90 minutes (or until doubled), and then proceed with the rolling, slicing, and baking instructions.
What is the secret to getting a creamy, non-runny frosting for these rich cinnamon rolls?
The perfect cream cheese frosting requires room temperature ingredients. Seriously, if your butter and cream cheese are cold, your frosting will be lumpy and stiff, refusing to spread smoothly. Whip the butter and cream cheese together until they are incredibly smooth and fluffy before adding the powdered sugar, scraping down the sides often. If the mixture seems too thin, incorporate extra powdered sugar one tablespoon at a time. If it’s too thick, add a tiny splash of milk or lemon juice. This technique guarantees the luxurious, decadent topping your rolls deserve.
Are there any successful dairy-free substitutions for making red velvet sticky buns?
You can certainly adapt this recipe to be dairy-free without sacrificing flavor or texture! Substitute the cow’s milk with a creamy plant-based alternative like oat or soy milk. Use vegan butter sticks (not margarine) in the dough and filling, as they offer the necessary fat content and richness required for baking. For the crucial cream cheese frosting, look for high-quality, plant-based cream cheese alternatives that are specifically designed for baking applications. Remember that yeast reacts slightly differently with these substitutes, so keep an eye on your proofing times to ensure your delicious red velvet sticky buns rise properly.