Remember those late-night cravings where you couldn’t decide between a warm, gooey cookie and a slice of creamy cheesecake? I solved that eternal dilemma because, frankly, life is too short for dessert decision fatigue.
Say hello to the perfect union: the magnificentChocolate Chip Cheesecake Cookies!—a glorious, buttery, cream-cheese-stuffed masterpiece designed to make your taste buds sing opera.
- The filling comes together effortlessly, transforming a standard cookie batter into a bakery-worthy treat without complicated techniques.
- Experience the perfect sweet and salty balance, where rich brown sugar cookie dough meets a slightly tart, vanilla-infused cream cheese swirl.
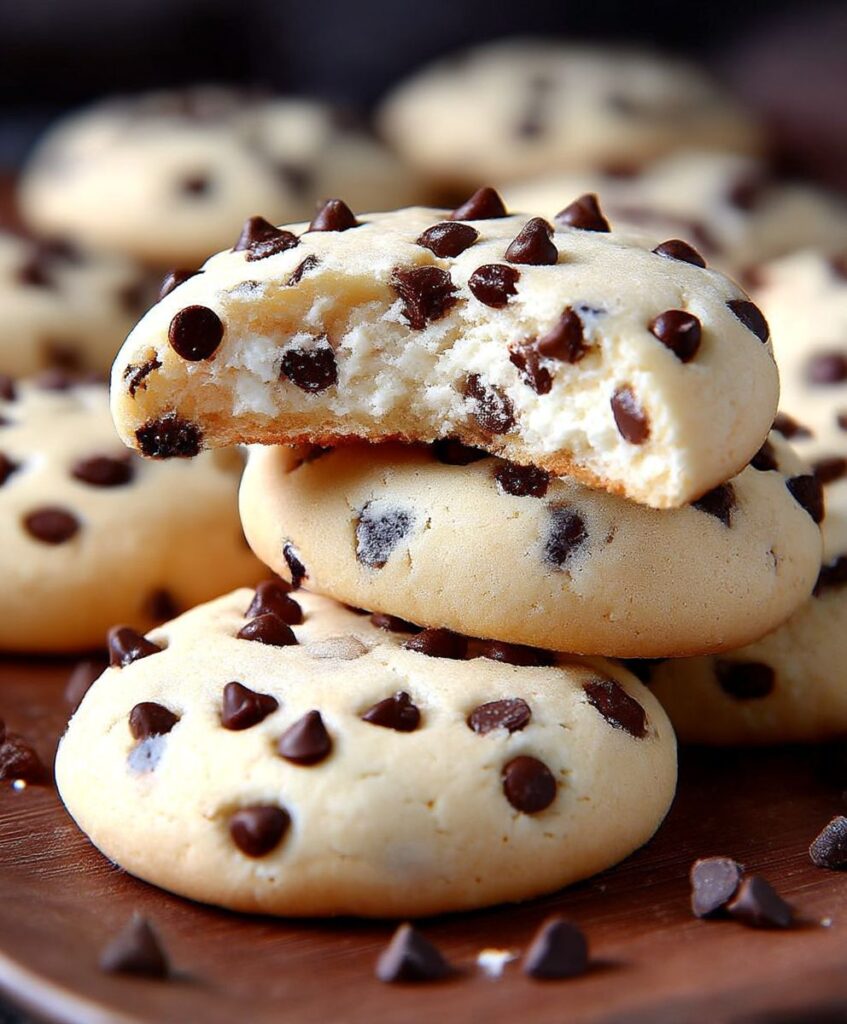
- These cookies bake up beautifully marbled, displaying golden edges and a creamy white center dotted with dark, melted chocolate chips.
- Ideal for holiday cookie swaps, casual Sunday baking, or when you simply need a single-serving dessert that feels incredibly decadent.
The Eternal Battle: Cookie Versus Cheesecake
I am a firm believer that if you put two great desserts together, the resulting third creation must be exponentially better. It’s simple dessert math, really. For years, I suffered through the tragedy of having to choose sides. Do I want the comforting crunch and chew of a classic cookie, smelling deliciously of browned butter and molasses? Or do I crave the silky tang and sophisticated richness of a smooth cheesecake?
It was a constant, tiring negotiation with myself. Then, one rainy afternoon, armed with a block of cream cheese and a serious lack of patience, I decided to stage a merger. I didn’t just want a cookie topped with cream cheese frosting; I wanted the cheesecake experience baked right into the center of the world’s best chocolate chip cookie. This required engineering, precision, and perhaps a small amount of maniacal laughter.
Conquering the Dessert Decision Fatigue
The beauty of theChocolate Chip Cheesecake Cookies!lies in their deceptive simplicity. While they look like they were handcrafted by a pastry wizard operating out of a tiny Parisian bakery, the process is surprisingly straightforward. You are essentially making two mini-doughs: one robust, traditional cookie base, and one tangy, delicate cheesecake filling. The magic happens when these two frenemies meet on the baking sheet.
The key to success is contrasting textures. The cookie base needs to be sturdy enough to hold its shape but soft enough to yield to a bite. We achieve this by using melted butter (for that chewy center) and a slightly higher ratio of brown sugar to granulated sugar (for moisture and flavor depth). Meanwhile, the cream cheese filling—whipped until airy and smooth—melts just enough to create that glorious, marbled heart without running all over your baking sheet. If you nail the technique, you get a warm cookie with a molten, creamy core that honestly feels like cheating.
Why Chilling Your Cookie Dough is Non-Negotiable
I know, I know. Patience is a virtue, especially when the scent of vanilla and butter is permeating your kitchen. But skipping the chilling step when making this type of swirled cookie is culinary treason. Standard chocolate chip cookies benefit from chilling because it allows the flour to fully hydrate and prevents the cookies from spreading into flat, greasy puddles. For this cheesecake hybrid, chilling is even more crucial.
Chilling the dough ensures that the buttery base is cold and firm when it hits the heat of the oven. This gives the delicate cream cheese filling time to stabilize before the cookie dough fully bakes and sets around it. If you skip this step, the filling will likely melt out the sides, turning your beautiful creation into an abstract, disappointing mess. Aim for at least two hours in the refrigerator. Use that time wisely: perhaps to clean up, or more realistically, to stare longingly at the fridge door while anticipating these stunning cookies.
Ingredients for Chocolate Chip Cheesecake Cookies!
Here’s what you’ll need to make this delicious dish:
- All-Purpose FlourThe structural backbone of the cookie; ensure it is properly measured, either sifted or spooned lightly into the cup.
- Unsalted ButterWe melt this initially for a chewier texture; unsalted allows you to control the overall salt content precisely.
- Brown Sugar and Granulated SugarA balanced combination for flavor and structure, with brown sugar providing moisture and chewiness.
- Large EggsUsed in both the cookie dough and the filling; make sure they are at room temperature for better emulsification.
- Alcohol-Free Vanilla ExtractUse high-quality pure alcohol-free vanilla extract to enhance both the buttery cookie base and the creamy filling.
- Baking SodaProvides lift and helps the cookies achieve that desirable, slightly domed shape.
- Semi-Sweet Chocolate ChipsStandard baking chips work perfectly, but you can also chop a high-quality baking bar for larger puddles of chocolate.
- Full-Fat Cream CheeseEssential for the filling; ensure it is softened completely to achieve a smooth, lump-free texture.
- SaltCrucial for balancing the sweetness and enhancing the deep, caramelized flavors of the cookie dough.
The full ingredients list, including measurements, is provided in the recipe card directly below.
How to Make Chocolate Chip Cheesecake Cookies!
Follow these simple steps to prepare this delicious dish:
Step 1: Prepare the Cheesecake Filling Base
In a medium bowl, beat the softened full-fat cream cheese until it is completely smooth, using an electric mixer if possible. Add the remaining filling ingredients—sugar, one egg yolk, and alcohol-free vanilla extract—mixing only until just combined and smooth. Overmixing can incorporate too much air, which may cause the filling to puff up excessively in the oven. Transfer this cream cheese mixture to a small bowl, cover it with plastic wrap, and place it in the refrigerator while you prepare the cookie dough.
Step 2: Create the Rich Chocolate Chip Cookie Dough
Preheat your oven to 350°F (175°C). In a large bowl, whisk together the melted butter, brown sugar, and granulated sugar until well combined. Beat in the remaining two large eggs one at a time, ensuring each is fully incorporated before adding the next. Stir in the alcohol-free vanilla extract. In a separate bowl, whisk together the dry ingredients: flour, baking soda, and salt. Gradually add the dry mixture to the wet mixture, mixing on low speed until the dough just comes together. Be careful not to overmix.
Step 3: Fold in the Chocolate and Chill the Dough
Once the basic cookie dough is formed, gently fold in the semi-sweet chocolate chips using a rubber spatula. Once the chips are evenly distributed, cover the bowl tightly and chill the cookie dough for a minimum of two hours. If you are extremely impatient, a 30-minute stint in the freezer can help, but chilling for longer yields a better final structure for these decadent cookies.
Step 4: Scooping, Swirling, and Baking
Line two baking sheets with parchment paper. Use a standard cookie scoop (about 3 tablespoons) to portion the chilled cookie dough. Roll the dough into smooth balls, then gently press your thumb into the center of each ball to create a deep well. Spoon a generous teaspoon (about 10–15 grams) of the chilled cheesecake filling into this indentation. You can leave the filling exposed or gently pull the cookie dough edges up to partially encapsulate the filling, creating that beautiful marbled swirl effect.
Step 5: The Final Bake and Cooling
Place the scooped dough balls 2 inches apart on the prepared baking sheets. Bake for 12 to 15 minutes, or until the edges are golden brown and the cheesecake centers look set but slightly soft. If you notice any filling escaping, simply use the back of a spoon to gently push it back into the cookie base immediately upon removal from the oven. Let the cookies cool on the baking sheet for 5 minutes before transferring them to a wire rack to cool completely. This crucial step ensures the creamy center fully stabilizes.
Advanced Tips for the Ultimate Cheesecake Hybrid
While the basic steps will yield incredible results, a few insider tricks can elevate yourChocolate Chip Cheesecake Cookies!from “very good” to “I need this recipe immediately.” Baking is science, but delicious baking is often about paying attention to the tiny details that most people overlook. These small adjustments guarantee the perfect texture and flavor every single time you bake.
Achieving the Perfect Uniform Size
Cookie consistency is the difference between a sad, burnt batch and a perfectly golden dozen. Use an electronic kitchen scale to weigh your individual cookie dough portions before adding the filling. Aim for 60 to 70 grams of cookie dough per portion. This ensures that every cookie bakes evenly and takes exactly the same amount of time to reach golden perfection. Uniformity also makes them visually stunning when stacked on a dessert platter.
Flavor Boosts Beyond Vanilla
Vanilla is classic, but why stop there? Consider adding a hint of lemon zest—just a quarter teaspoon—to the cheesecake filling. The lemon zest intensifies the tanginess of the cream cheese, providing a brighter contrast to the richness of the brown sugar cookie dough. Alternatively, if you want a richer, deeper flavor profile, try swapping out half of the alcohol-free vanilla extract for alcohol-free almond extract in the cookie dough. This gives the final product a subtle, sophisticated background note that guests will notice without necessarily identifying the ingredient.
Storage and Reheating
These cookies are truly best enjoyed the day they are baked, especially while still slightly warm. However, if you have any leftovers (a highly unlikely scenario, I know), store them in an airtight container at room temperature for up to three days. Because of the cream cheese filling, some people prefer refrigerating them, which works perfectly fine, but they will be firmer. To restore that fresh-out-of-the-oven feel, pop them into a 300°F (150°C) oven for about five minutes. The chocolate will melt slightly, and the center will soften beautifully.
Transfer to plates and drizzle with sauce for the perfect finishing touch. Serve these magnificent swirled treats alongside a cold glass of milk or a steaming cup of coffee for the ultimate indulgent break.
The Accidental Discovery of Sunshine on a Plate

I was trying to make a simple chocolate chip cookie dough when I accidentally dolloped leftover cream cheese frosting onto them. The oven worked its magic, transforming my mistake into the magnificent, creamy hybrid we now callChocolate Chip Cheesecake Cookies!
Perfecting the Cooking Process
Achieving that perfect texture requires sequence: first, thoroughly chill the cookie dough. Next, prepare the smooth cheesecake filling. Finally, assemble the cookies, ensuring you seal the filling inside before baking them until they achieve golden-brown perfection.
Add Your Touch
Swap out classic chocolate chips for white chocolate or butterscotch morsels. For extra tang, add a zest of orange or lemon to the cream cheese mixture. If you love crunch, sprinkle chopped pecans or walnuts over the tops before baking.
Storing & Reheating
Store these delicious treats in an airtight container in the refrigerator for up to five days. To enjoy them warm, place the cookies in a preheated oven at 300°F (150°C) for about five minutes until the center softens beautifully.
Life is too short for boring cookies. You know the ones—the thin, crunchy discs that shatter the moment you touch them. We’re not here for mediocrity. We are here for maximum decadence, the kind that whispers sweet, creamy secrets every time you take a bite. Get ready, because we are diving headfirst into the glorious fusion dessert that changed my life: the ultimate Chocolate Chip Cheesecake Cookies!
The Recipe That Broke the Internet (or at least, my oven)
I vividly remember the Saturday afternoon when the heavens opened, and this recipe was born. It started as a humble attempt at a classic chocolate chip batch, but I had an abundance of leftover cream cheese. Being the culinary anarchist I am, I decided: “Why not marry them?” Initially, I expected a gooey, disappointing mess. Instead, what emerged from the oven was a perfectly formed cookie cup, cradling a rich, tangy cheesecake center. It was everything I ever wanted in a dessert—chewy edges, soft center, and a surprise creamy explosion.
These cookies aren’t just a treat; they are a statement. They proclaim that you refuse to choose between your favorite dessert categories. Why have cake OR cookies when you can have dessert domination? The key to unlocking this magic lies in the balancing act: getting the cookie base robust enough to hold the filling without becoming dry, and making the filling creamy without melting into a disaster. We want that perfect marriage of texture, where the slight chewiness of the cookie base gives way to the smooth, rich interior.
Ingredients for Ultimate Decadence
Before we embark on this sugary journey, let’s gather our troops. The ingredients list is simple, but quality matters, especially when dealing with cream cheese. Make sure everything is at room temperature unless otherwise specified; this is crucial for smooth blending and preventing lumpy filling, which nobody enjoys in a fancy dessert hybrid.
For the Classic Chocolate Chip Cookie Base:
- 2 ¼ cups all-purpose flour
- 1 teaspoon baking soda
- 1 teaspoon salt
- 1 cup unsalted butter, softened
- ¾ cup granulated sugar
- ¾ cup packed brown sugar
- 1 teaspoon alcohol-free vanilla extract
- 2 large eggs
- 2 cups semi-sweet chocolate chips (the good ones!)
For the Dreamy Cheesecake Filling:
- 8 ounces (1 block) cream cheese, softened
- ½ cup granulated sugar
- 1 large egg yolk
- 1 teaspoon alcohol-free vanilla extract
- 1 tablespoon flour (to stabilize the filling)
The Crafting Process: Turning Dough into Dessert Royalty
Preparation might seem like the longest part, but trust me, the chilling is essential. Think of it as forcing the dough to meditate before its big performance in the oven. If you skip chilling, you will end up with flat, sorrowful puddles instead of magnificent, plump cookies. This dough needs structure and attitude to handle the creamy interior it will soon cradle.
Step 1: Building the Base
In a medium bowl, whisk together the flour, baking soda, and salt. Set that aside. In a large mixing bowl, beat the softened butter, granulated sugar, and brown sugar until the mixture is light and fluffy—this should take about three minutes. Ensure the butter and sugars are fully incorporated to maximize lift and texture.
Add the eggs one at a time, mixing well after each addition, followed by the alcohol-free vanilla extract. Gradually incorporate the dry ingredients until just combined. Fold in those glorious chocolate chips. Now, resist the urge to eat the entire bowl. Cover the bowl and chill the dough for at least 30 minutes, or up to 2 hours. This chilling step is non-negotiable if you want thick, chewy cookies.
Step 2: Preparing the Creamy Heart
While the cookie dough chills, prepare the cheesecake filling. In a separate, smaller bowl, beat the softened cream cheese until it is completely smooth and lump-free. A hand mixer works wonders here. Add the granulated sugar, egg yolk, alcohol-free vanilla extract, and one tablespoon of flour. Beat until everything integrates perfectly into a silky, thick filling.
The addition of the small amount of flour helps stabilize the filling, preventing it from weeping during the high heat of the oven. Transfer this filling to a piping bag (if you want precision) or simply use two spoons for easy assembly later. You can also cover and refrigerate the filling briefly if your kitchen runs warm.
Step 3: The Assembly Line
Preheat your oven to 375°F (190°C). Line two baking sheets with parchment paper. Take the chilled cookie dough and scoop out generous 2-tablespoon portions. Roll them into balls. Now comes the trickiest part: flatten each dough ball slightly and use your thumb or the back of a spoon to create a small, deep indentation in the center of the cookie dough (a nice little cookie crater).
Fill this indentation with about 1 teaspoon of the cheesecake filling. You want the filling nestled inside the cookie dough cradle, ensuring the edges of the dough still rise above the filling to seal it slightly. This sealing technique ensures the cheesecake remains centralized and creamy rather than spreading out into a thin mess. If you handle the dough too much, return it to the fridge for a few minutes before baking.
Step 4: Baking Brilliance
Bake the Chocolate Chip Cheesecake Cookies! for 10 to 12 minutes, rotating the sheets halfway through, until the edges are golden brown and the cheesecake filling is set but still looks creamy white. Do not overbake! Overbaking will turn the beautiful, creamy interior into something rubbery, ruining that delightful texture contrast we worked so hard to achieve. Let the cookies cool on the baking sheet for five minutes before transferring them to a wire rack to cool completely. The centers will firm up as they cool, achieving that perfect, fudgy texture contrast that makes this dessert truly magnificent.
Expert Secrets for Perfect Chocolate Chip Cheesecake Cookies!
Listen closely, because these simple tweaks are the difference between a good cookie and a legendary one:
-
Always use full-fat, brick-style cream cheese, never the spreadable kind from a tub, as it contains too much water and will make your filling runny.
-
Ensure your egg yolk is added to the filling; the fat and protein act as a stabilizer, preventing the cheesecake center from collapsing during cooling.
-
Do not skip the chilling time for the cookie dough; chilled dough ensures the cookies retain their structure and thickness when surrounding the creamy filling.
The first time my neighbor tasted these, she swore I bought them from a boutique bakery. Her look of shock when I said they were homemade was worth the price of all the ingredients combined!
Conclusion for Chocolate Chip Cheesecake Cookies!
These decadentChocolate Chip Cheesecake Cookies!prove that you don’t have to compromise when it comes to dessert perfection. By carefully following the steps—especially the crucial chilling and the correct assembly technique—you ensure a chewy, chocolatey exterior surrounding a velvety, tangy cheesecake center. Whether you are hosting a gathering or just craving the ultimate mashup treat, this recipe delivers maximum joy in every bite. Go ahead, bake a batch and prepare for the compliments; you’ve just leveled up your baking game considerably.
Print
Chocolate Chip Cheesecake Cookies!
- Total Time: 35 minutes
- Yield: 4 servings
Description
Get the secret to chewy cookies with a creamy, cheesecake center! We start by creaming soft butter and tangy cream cheese for an unparalleled texture.
Ingredients
- All-Purpose Flour: 1 1/2 cups
- Unsalted Butter: 1/2 cup (1 stick), softened
- Cream Cheese: 4 ounces, softened
- Granulated Sugar: 3/4 cup
- Large Egg: 1
- Vanilla Powder: 1 teaspoon
- Baking Powder: 1/2 teaspoon
- Semi-Sweet Chocolate Chips: 1 cup
Instructions
- Step 1: Preheat the oven to 350°F (175°C). Line two baking sheets with parchment paper. In a large bowl, use an electric mixer to cream together the softened butter, softened cream cheese, and granulated sugar until the mixture is light and fluffy (about 2 minutes).
- Step 2: Beat in the large egg and vanilla bean paste until fully incorporated. In a separate medium bowl, whisk together the flour and baking powder, ensuring the dry ingredients are evenly distributed.
- Step 3: Gradually add the dry ingredient mixture to the wet mixture, mixing on low speed until the dough just comes together. Be careful not to overmix. Fold in the semi-sweet chocolate chips by hand using a spatula.
- Step 4: Scoop the dough using a medium cookie scoop (about 1.5 tablespoons) and place the balls onto the prepared baking sheets, spacing them about 2 inches apart. Optionally, lightly chill the scooped dough for 15 minutes to prevent excessive spreading.
- Step 5: Bake for 10-12 minutes, or until the edges are lightly golden brown and the centers are set but still soft. Let the cookies cool on the baking sheet for 5 minutes before transferring them to a wire rack to cool completely.
Notes
- For optimal freshness and texture, store cooled cookies in an airtight container at room temperature for up to three days, or refrigerate if keeping them longer than that due to the cream cheese content.
- If the cookies lose their initial softness, warm them briefly (5-10 seconds) in the microwave or toast them gently in a 300°F oven for 2 minutes to restore that gooey, "just baked" center.
- To ensure your cookies maintain a beautiful, thick shape and avoid excessive spreading due to the high-fat cream cheese, always complete the optional 15-minute chill step after scooping the dough.
- Elevate the experience by serving these rich, tangy cookies alongside a scoop of vanilla bean ice cream or a small glass of cold milk infused with a hint of espresso.
- Prep Time: 15 minutes
- Cook Time: 20 minutes
- Method: Stovetop
- Cuisine: American
Nutrition
- Serving Size: 1 medium cookie (approx. 45g)
- Calories: 195
- Sodium: 140mg
- Fat: 11g
- Saturated Fat: 6.5g
- Trans Fat: 0.1g
- Protein: 17g