Remember those desperate dessert cravings, when baking feels like a marathon? Creamy No-Bake Oreo Mousse Cups – Easy Chocolate Dessert swoops in, offering pure bliss without ever touching the oven. Imagine a dessert so simple yet decadent, a rich chocolate and cookie crumble symphony. These cups make you an instant hero, perfect for any spontaneous sweet tooth emergency or gathering. * Effortlessly whip up this dessert marvel with minimal fuss, making it perfect for last-minute cravings or impressive party contributions. * Savor the rich, velvety chocolate mousse perfectly complemented by crunchy Oreo cookie pieces, delivering an irresistible texture and flavor combination. * Delight your guests with visually stunning, individually portioned cups, making elegant serving a breeze and presentation a pure joy. * Adapt this versatile recipe for any occasion, from cozy family nights to sophisticated dinner parties, always guaranteeing a crowd-pleasing treat.
Why These No-Bake Delights Are Your New Best Friend
Picture this: It’s a scorching summer day, the last thing you want is to fire up your oven and turn your kitchen into a sauna. Or perhaps you’ve just hosted a dinner party, the main course was a triumph, but now everyone’s eyeing you for dessert and your energy reserves are running on fumes. This is precisely the moment when the magic of no-bake desserts enters stage left, a true culinary superhero in disguise. These delightful chocolate cookie cups are not just a treat for your taste buds; they are a beacon of hope for weary hosts and a testament to clever dessert engineering. Forget the anxiety of undercooked centers or burnt edges. These mousse cups skip the oven drama entirely, delivering pure, unadulterated indulgence with minimal effort.
My own journey to no-bake enlightenment began one frantic holiday season. I had promised a spectacular dessert, but a plumbing emergency meant my oven was out of commission. Panic set in. Could I really create something “spectacular” without baking? Necessity, as they say, is the mother of invention, and that day, these rich, creamy mousse cups became my savior. They were an instant hit, garnering compliments and surprised gasps when I revealed they never saw the inside of an oven. Since then, they’ve become my secret weapon, proving that sometimes, the simplest path leads to the most extraordinary destinations. They are a declaration that deliciousness does not need an elaborate production; sometimes, it just needs a mixer and some serious chilling time.
Ingredients for Creamy No-Bake Oreo Mousse Cups – Easy Chocolate Dessert
Here’s what you’ll need to make this delicious dish:
- Oreo CookiesThe undisputed star, providing the iconic chocolate flavor and delightful crunch for both the base and a decorative topping.
- Unsalted ButterMelted to perfection, this binds the cookie crumbs together, creating a firm and delicious crust for your individual mousse cups.
- Cream CheeseSoftened full-fat cream cheese forms the luscious, slightly tangy base, lending a rich smoothness to the mousse.
- Granulated SugarAdds just the right amount of sweetness, perfectly balancing the cream cheese and cocoa powder for a harmonious flavor profile.
- Unsweetened Cocoa PowderEssential for a deep, intense chocolate flavor, ensuring the mousse is incredibly satisfying for any chocolate enthusiast.
- Vanilla PowderA splash of pure vanilla powder brightens all the other ingredients, adding a warm, aromatic depth that elevates the entire dessert.
- Heavy CreamWhipped to stiff, ethereal peaks, it provides the airy, light texture that makes the mousse so wonderfully creamy and wonderfully decadent.
- Powdered SugarUsed to stabilize the whipped cream, it ensures your mousse holds its beautiful shape and contributes to an effortlessly smooth consistency.
The full ingredients list, including measurements, is provided in the recipe card directly below.
How to Make Creamy No-Bake Oreo Mousse Cups – Easy Chocolate Dessert
Follow these simple steps to prepare this delicious dish:
Step 1: Prepare the Cookie CrustCrush about 20 Oreo cookies very finely using a food processor or by placing them in a sealed bag and crushing with a rolling pin. In a medium bowl, combine these fine crumbs with 1/4 cup of melted unsalted butter, mixing thoroughly until evenly coated. Press approximately 1-2 tablespoons of this mixture firmly into the bottom of 8-10 individual serving cups, ramekins, or small mason jars. Place these into the refrigerator to chill for a minimum of 15 minutes, allowing the crust to set. This chilling time is crucial for a stable base.
Step 2: Make the Chocolate Cream Cheese BaseIn a separate large mixing bowl, beat 8 ounces of softened full-fat cream cheese with 1/2 cup of granulated sugar using an electric mixer on medium speed. Continue mixing until the mixture becomes wonderfully smooth and perfectly creamy, with no lumps visible. Next, carefully incorporate 1/4 cup of unsweetened cocoa powder and 1 teaspoon of pure vanilla powder, beating until all ingredients are fully combined and the chocolate color is uniform throughout. Scrape down the sides of the bowl as needed to ensure everything is well-mixed.
Step 3: Whip the Heavy CreamUsing another separate, impeccably clean and ideally chilled bowl (a metal bowl works wonders here), pour in 1 ½ cups of very cold heavy cream. Begin whipping the cream with an electric mixer on medium-high speed. Once the cream starts to thicken slightly, gradually add 2 tablespoons of powdered sugar. Continue whipping until beautiful stiff peaks form, meaning the cream holds its shape when the beater is lifted. Be vigilant and avoid overbeating, as this can cause the cream to become grainy or separate.
Step 4: Fold the Mousse TogetherNow comes the delicate part: combining the two main components. Gently fold about a third of the whipped cream into the chocolate cream cheese mixture. This initial addition helps to lighten the cream cheese base, making it easier to incorporate the rest of the whipped cream without deflating it. Then, very carefully fold in the remaining whipped cream using a rubber spatula, employing a gentle lifting motion, until just combined. The goal is to maintain as much of the whipped cream’s airiness as possible, ensuring a light and fluffy mousse.
Step 5: Assemble the Mousse CupsOnce your mousse is perfectly folded, spoon or pipe the creamy chocolate mousse mixture evenly over the chilled cookie crusts in your prepared serving cups. For a professional finish, you can use a piping bag with a star tip. Crush an additional 5-6 Oreo cookies and generously sprinkle these extra crumbs over the top of each mousse cup. This adds another layer of texture and visual appeal, signalling the deliciousness within.
Step 6: Chill and ServeThis final step is perhaps the hardest: patience. Refrigerate the assembled Creamy No-Bake Oreo Mousse Cups for a minimum of 2-4 hours. For the absolute best results, allowing them to chill overnight is highly recommended. This extended chilling time permits the mousse to firm up beautifully and allows all the wonderful flavors to meld together perfectly. Serve chilled directly from the cups, ready to delight with every spoonful of this incredibly easy chocolate dessert.
Tips for Achieving Mousse Perfection
Crafting the perfect mousse, even a no-bake one, involves a few clever tricks that elevate it from good to absolutely phenomenal. First and foremost, ensure all your dairy ingredients, especially the heavy cream and cream cheese, are at the right temperature. Heavy cream whips best when it’s very cold; chilled bowls and beaters can also significantly speed up the process and result in stiffer, more stable peaks. Conversely, cream cheese should be softened to room temperature. This crucial step prevents lumps and ensures a smooth, uniform base for your chocolate mousse, integrating seamlessly with other ingredients without curdling.
When it comes to folding the whipped cream into the chocolate base, remember that gentleness is your best friend. Resist the urge to aggressively stir or beat the mixture. Instead, use a large rubber spatula and employ a light, ‘fold-over’ motion. Start by lightening the heavier cream cheese mixture with a small amount of whipped cream, then gently incorporate the rest. This technique helps retain all the precious air you worked so hard to whip into the cream, which is what gives the mousse its signature light and airy texture. Overmixing is the enemy of fluffy mousse, so stop as soon as everything is just combined.
Finally, don’t underestimate the power of chilling. While these are called no-bake, the refrigerator is where the magic truly happens. A minimum of two to four hours allows the mousse to firm up and the flavors to deepen. However, an overnight chill is truly transformative. It allows the textures to become perfectly set, ensuring each spoonful is a delightful, coherent experience rather than a soft, unset dollop. Patience here pays off immensely, transforming a simple mixture into a sophisticated, perfectly set chocolate treat.
Creative Twists and Flavor Adventures
While the classic iteration of these no-bake chocolate treats is undeniably delicious, there’s always room for a little culinary creativity. Feel free to experiment with different cookie bases. Instead of Oreos, consider using chocolate wafer cookies, graham crackers, or even shortbread for a varied flavor profile. You could also mix in some toasted nuts, like chopped pecans or almonds, with your cookie crust for an added layer of texture and nutty richness. These simple substitutions can dramatically change the dessert’s character, making it uniquely yours.
Elevating the mousse itself offers even more exciting possibilities. Consider adding a touch of instant espresso powder to the chocolate cream cheese mixture; it won’t make your dessert taste like coffee, but it will enhance the chocolate flavor, making it even more profound and complex. For a citrusy zing, a tablespoon of orange zest could be folded into the mousse, creating a delightful orange-chocolate symphony. You could also swirl in a bit of caramel or a berry reduction before chilling for streaks of contrasting color and flavor. The possibilities are truly endless, limited only by your imagination.
Storing Your Divine Chocolate Mousse Cups
Proper storage is key to enjoying your Creamy No-Bake Oreo Mousse Cups for days to come. After they have thoroughly chilled and set, cover each individual cup tightly with plastic wrap. This step is crucial to prevent the mousse from absorbing any unwanted odors from the refrigerator and to keep it from drying out. Store the covered cups in the refrigerator, where they will maintain their delicious texture and flavor for up to 3-4 days. For optimal freshness and texture, consume them within this timeframe. While you can freeze these mousse cups for longer storage, the texture of the mousse and the cookie crust may change slightly upon thawing, becoming a bit softer. If freezing, cover them even more securely and thaw them in the refrigerator for several hours before serving.
Frequently Asked Questions About No-Bake Oreo Mousse
Can I make these Creamy No-Bake Oreo Mousse Cups ahead of time?
Absolutely! These mousse cups are perfect for making in advance. You can prepare them up to 2 days ahead of your event. In fact, chilling them overnight often results in a better-set mousse with more developed flavors, making them an ideal stress-free dessert option for entertaining.
What if I don’t have individual serving cups?
No individual cups? No problem! You can easily make this recipe in a single 8×8 inch square baking dish. Simply press the entire cookie crust into the bottom of the dish, then spread the mousse evenly over the top. Chill as directed, then slice into squares for serving.
Can I use different types of cookies for the crust?
Yes, certainly! While Oreos provide a classic flavor, you can absolutely experiment with other cookies. Chocolate wafer cookies, graham crackers, or even vanilla sandwich cookies would make excellent alternatives, offering different flavor nuances to your no-bake chocolate dessert.
A Sweet Victory Awaits!
There you have it: the ultimate secret weapon for any dessert emergency, a culinary triumph that requires no oven and minimal stress. These Creamy No-Bake Oreo Mousse Cups are more than just a recipe; they are a promise of pure, unadulterated joy in every spoonful. From the crunchy cookie base to the velvety chocolate mousse and the delightful sprinkle of cookie crumbs on top, each element works in perfect harmony to create a truly irresistible treat. Whether you’re a seasoned dessert connoisseur or a kitchen novice, this easy chocolate dessert empowers you to create something truly spectacular without the fuss.
So, the next time a chocolate craving strikes, or you need a show-stopping dessert that practically makes itself, look no further. Gather your ingredients, whip up this magic, and prepare to bask in the glory of your sweet victory. Your taste buds, and your guests, will thank you profusely for introducing them to this remarkably simple yet utterly decadent pleasure. Go forth and conquer your dessert dreams!
Remember those times you absolutely *needed* dessert, and waiting for something to bake felt like an eternity? Or perhaps a last-minute gathering suddenly appeared on your calendar, demanding a show-stopping sweet treat without the stress? Well, dear reader, I’ve been there. My kitchen once resembled a battlefield after a particularly ambitious baking attempt. Flour explosions, sunken cakes, and frosting gone rogue – it was a scene of culinary chaos. But from the ashes of those past baking blunders rose a dessert so simple, so utterly delightful, it transformed my entire perception of sweet endings.
Imagine a world where decadent chocolatey goodness meets the satisfying crunch of America’s favorite cookie, all without ever turning on your oven. A dessert that whispers sweet nothings of ease and indulgence. Yes, such a wonderland exists, and it’s encapsulated in every spoonful of these magnificent creations. They are the superheroes of the dessert world: quick to assemble, impossibly creamy, and guaranteed to impress even the most discerning sweet tooth. Get ready to ditch the oven mitts and embrace the chill, because your dessert game is about to get a seriously delicious upgrade. No more baking anxieties, only pure, unadulterated, chocolatey joy.
Why You’ll Fall Head Over Heels for These Creamy No-Bake Oreo Mousse Cups
Let’s be honest, life is busy. Sometimes, the idea of spending hours in the kitchen for a dessert, especially after a long day, feels more like a chore than a treat. This is where the magic of no-bake desserts swoops in to save the day, and these Creamy No-Bake Oreo Mousse Cups are the undisputed champions. They don’t just save you time; they deliver an experience. We are talking layers of crushed Oreo bliss, followed by a cloud-like chocolate mousse, all crowned with even more crunchy cookie goodness. It’s a textural paradise and a flavor explosion in every single bite. Forget complicated techniques and endless clean-up; this easy chocolate dessert is designed for maximum impact with minimal effort, leaving you more time to savor the moment (and the mousse).
The Secret to No-Bake Nirvana
The beauty of a no-bake recipe lies in its simplicity. No oven preheating, no checking for doneness, and no worrying about a cake falling flat. This dessert relies on the fridge, transforming simple ingredients into a firm, yet wonderfully airy, treat. It means less stress for you and more time to enjoy your company, or perhaps just a quiet moment of dessert-induced bliss on your own. It’s the ultimate hack for effortless entertaining or a speedy weeknight indulgence.
A Symphony of Chocolatey Bliss
While the “no-bake” aspect is incredibly appealing, let’s not forget the star of the show: the flavor! We combine the iconic taste of Oreos with a rich, yet light, chocolate mousse. Each spoonful offers a delightful contrast—the slight bitterness of dark chocolate, the familiar sweetness of the cookie, and a truly creamy texture that melts in your mouth. This isn’t just a dessert; it’s a nostalgic trip with an elegant twist, perfect for any occasion that calls for something truly special.
Gather Your Arsenal: Ingredients for Creamy No-Bake Oreo Mousse Cups
Before we embark on this glorious no-bake adventure, let’s make sure our pantry is stocked with the finest provisions. You’ll find that many of these ingredients are likely already lurking in your kitchen, waiting for their moment to shine. We’re talking simple, accessible items that come together to create something truly spectacular. No exotic ingredients or lengthy grocery lists here, just pure, unadulterated deliciousness waiting to be unleashed. Gather these few items, and prepare for a dessert revolution!
For the Crust That Crunches Just Right:
- 1 ½ cups (about 15-18 cookies) finely crushed Oreo cookies (whole cookie, filling included)
- ¼ cup unsalted butter, melted
For the Mousse That Dreams Are Made Of:
- 8 ounces (1 block) cream cheese, softened
- ½ cup granulated sugar
- 1 teaspoon vanilla powder
- ½ cup cocoa powder (unsweetened)
- 1 ¾ cups heavy whipping cream, chilled
- ¼ cup confectioners’ sugar
For the Glorious Garnish (Optional, but Highly Recommended!):
- Extra crushed Oreo cookies
- Chocolate shavings or mini chocolate chips
- Fresh berries (strawberries, raspberries)
Whip Up Some Magic: Step-by-Step Instructions
Alright, culinary adventurers, let’s transform these humble ingredients into a dessert masterpiece! The process is surprisingly straightforward, designed for success even if your baking skills usually involve calling for takeout. Just follow these steps, and you’ll be on your way to enjoying the most luscious Creamy No-Bake Oreo Mousse Cups. Patience and a good chilling period are your best friends here. Let’s get started, shall we?
Crafting the Crunchy Oreo Base
First, we need to establish a solid foundation for our mousse. Crush your Oreo cookies until they resemble fine crumbs. A food processor makes quick work of this, but a plastic bag and a rolling pin work just as well for a satisfying stress-relief activity. In a medium bowl, combine the crushed Oreos with the melted butter. Mix until the crumbs are evenly moistened. Divide this mixture among 6-8 individual serving cups or ramekins. Press the mixture firmly into the bottom of each cup to form an even crust. Pop these into the refrigerator while you prepare the mousse.
Mixing Up the Mousse Masterpiece
Now for the star of the show! In a large mixing bowl, beat the softened cream cheese, granulated sugar, and vanilla powder together until smooth and creamy. Make sure there are no lumps remaining. Gradually beat in the cocoa powder until it is fully incorporated and the mixture is smooth and chocolatey. In a separate, chilled bowl, whip the heavy whipping cream and confectioners’ sugar together until stiff peaks form. Be careful not to over-whip, as it can turn grainy. Gently fold about a third of the whipped cream into the cream cheese mixture to lighten it. Then, carefully fold in the remaining whipped cream until everything is just combined and the mousse is light and airy. Overmixing here can deflate your mousse.
The Grand Assembly and Chilling
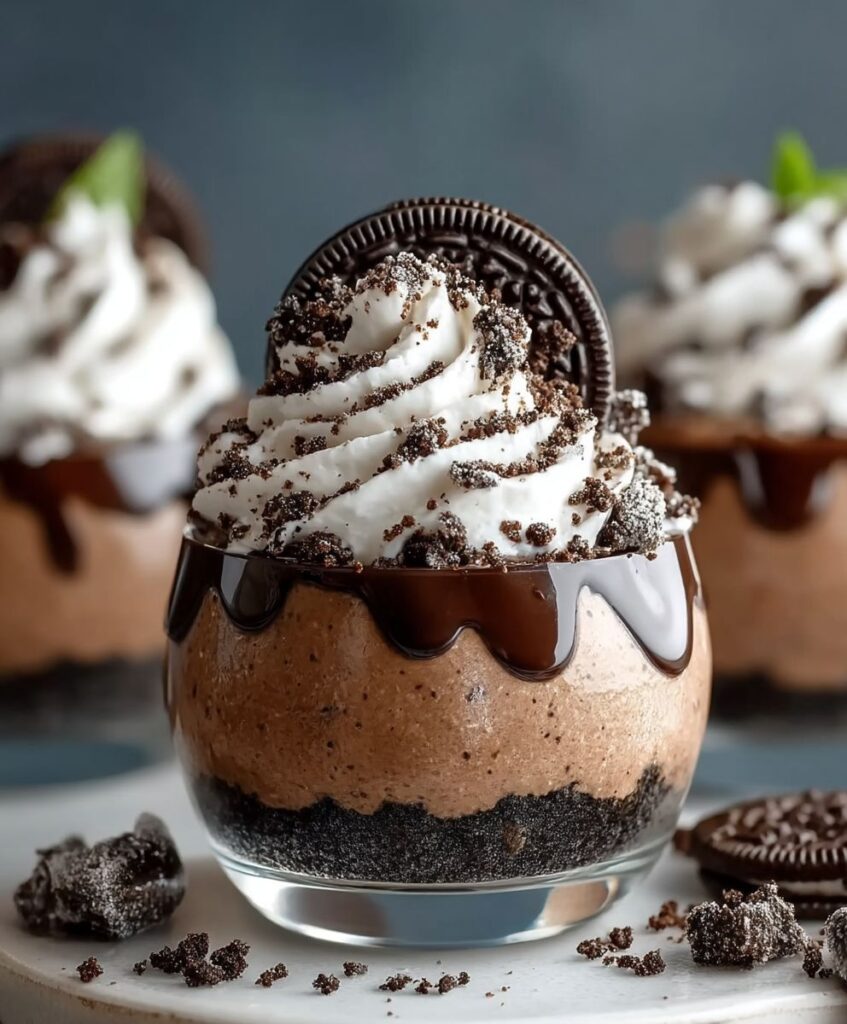
It’s time to bring it all together! Remove your chilled Oreo crusts from the refrigerator. Spoon or pipe the chocolate mousse mixture evenly over each crust, filling the cups to the top. Smooth the tops with a spoon or offset spatula. For the grand finale, garnish your Creamy No-Bake Oreo Mousse Cups with extra crushed Oreos, chocolate shavings, or fresh berries, if desired. Cover the cups loosely with plastic wrap and refrigerate for at least 4 hours, or preferably overnight, to allow the mousse to set beautifully. The longer they chill, the firmer and more delightful they become!
Perfecting the Cooking Process

For these Creamy No-Bake Oreo Mousse Cups, start by crushing the Oreos for the crust. While chilling the crust, prepare your mousse ingredients. Whip the cream last, just before folding everything together, to maintain its airy volume for a perfect, light texture. This sequence ensures optimal efficiency.
Add Your Touch
Feeling adventurous? Swap classic Oreos for mint or peanut butter varieties for a flavor twist. Enhance the chocolate factor with a drizzle of melted dark chocolate, or swirl in some berry compote for a tangy counterpoint. A tiny pinch of instant espresso powder in the mousse intensifies the cocoa notes beautifully.
Storing & Reheating
Store your Creamy No-Bake Oreo Mousse Cups in an airtight container in the refrigerator for up to 3 days. We do not recommend freezing them as the texture can become grainy. Simply enjoy them chilled straight from the fridge; no reheating necessary for this delightful dessert.
- Chill Your Bowl and Whisk:For the fluffiest whipped cream, pop your mixing bowl and whisk attachment into the freezer for 10-15 minutes before whipping. Cold tools lead to quicker, more stable peaks.
- Soften Cream Cheese Properly:Ensure your cream cheese is at true room temperature. This prevents lumps and ensures a silky-smooth mousse. Nobody wants a lumpy dessert, after all!
- Fold, Don’t Stir:When combining the whipped cream with the chocolate mixture, use a gentle folding motion. This maintains the airy texture, making your mousse light and cloud-like.
I once made these for a last-minute potluck, and my usually stoic uncle actually asked for the recipe! He even confessed it was “better than grandma’s pie,” which, coming from him, was practically a royal endorsement. That’s how you know you have a winner.
Common Questions About Creamy No-Bake Oreo Mousse Cups
You’ve got questions, and I’ve got answers! It’s completely normal to have a few queries when trying out a new recipe, especially one that promises such effortless deliciousness. I’ve compiled some of the most frequently asked questions about these Creamy No-Bake Oreo Mousse Cups to help you master this dessert with confidence. From making them ahead to customizing flavors, we’ve got you covered. Dive in and let’s clear up any lingering doubts!
Can I make these Creamy No-Bake Oreo Mousse Cups ahead of time?
Absolutely! In fact, making them a day in advance is highly recommended. This allows the mousse plenty of time to set perfectly, resulting in a firmer, more stable, and even more delicious dessert. Just keep them covered in the refrigerator until you are ready to serve.
What if I can’t find specific types of Oreos?
No problem at all! The beauty of this recipe is its flexibility. While classic Oreos are fantastic, feel free to use any variety you enjoy. Golden Oreos would offer a lovely vanilla contrast, or a chocolate-flavored sandwich cookie could work just as well.
How do I get a perfectly smooth mousse?
The key to a silky mousse lies in two things: using truly softened cream cheese and proper folding technique. Ensure your cream cheese is at room temperature before beating, and gently fold in the whipped cream to maintain its airy texture without overmixing.
Can I make this dessert in a large pan instead of individual cups?
Yes, you certainly can! Simply press the Oreo crust into the bottom of a 9×13 inch baking dish, then spread the mousse over the top. Chill as directed. When serving, you can scoop portions or cut into squares for a delightful layered dessert. Adjust chilling time if needed.
Why This Easy Chocolate Dessert is Your New Best Friend
So, there you have it: the ultimate guide to creating these irresistible Creamy No-Bake Oreo Mousse Cups. This isn’t just a recipe; it’s a passport to dessert freedom. No oven required, minimal fuss, and maximum flavor packed into every luscious serving. Whether you’re a seasoned dessert enthusiast or a novice in the kitchen, this easy chocolate dessert promises a foolproof path to sweet success. Imagine the satisfied smiles, the quiet murmurs of appreciation, and the sheer joy that will erupt when you present these beauties.
They are perfect for parties, cozy nights in, or simply when a craving for something decadently chocolatey strikes. Stop dreaming about perfect desserts and start making them! Gather your ingredients, follow these simple steps, and prepare to elevate your dessert game to legendary status. Go ahead, treat yourself and those you love to this heavenly, no-fuss delight. Your taste buds will thank you, and your oven will get a much-needed break!
Conclusion for Creamy No-Bake Oreo Mousse Cups – Easy Chocolate Dessert
And there you have it! The ultimate guide to crafting your very own batch of Creamy No-Bake Oreo Mousse Cups. This easy chocolate dessert proves that you don’t need an oven or complicated techniques to create something truly spectacular. We’ve explored how simple ingredients transform into layers of chocolatey, creamy bliss, perfect for any gathering or a quiet moment of indulgence. With its quick preparation and irresistible flavor, this no-bake wonder is set to become your new favorite. So go ahead, whip up these delightful cups, chill, and prepare for a chorus of delighted sighs. Happy dessert making!
Print
Creamy No-Bake Oreo Mousse Cups – Easy Chocolate Dessert
- Total Time: 35 minutes
- Yield: 4 servings
Description
Indulge effortlessly! Our no-bake Oreo mousse cups layer a crunchy cookie crust with rich, creamy chocolate perfection. Quick, easy, pure delight. Full instructions & nutrition details included.
Ingredients
- Oreo CookiesThe undisputed star, providing the iconic chocolate flavor and delightful crunch for both the base and a decorative topping.
- Unsalted ButterMelted to perfection, this binds the cookie crumbs together, creating a firm and delicious crust for your individual mousse cups.
- Cream CheeseSoftened full-fat cream cheese forms the luscious, slightly tangy base, lending a rich smoothness to the mousse.
- Granulated SugarAdds just the right amount of sweetness, perfectly balancing the cream cheese and cocoa powder for a harmonious flavor profile.
- Unsweetened Cocoa PowderEssential for a deep, intense chocolate flavor, ensuring the mousse is incredibly satisfying for any chocolate enthusiast.
- Vanilla PowderA splash of pure vanilla powder brightens all the other ingredients, adding a warm, aromatic depth that elevates the entire dessert.
- Heavy CreamWhipped to stiff, ethereal peaks, it provides the airy, light texture that makes the mousse so wonderfully creamy and wonderfully decadent.
- Powdered SugarUsed to stabilize the whipped cream, it ensures your mousse holds its beautiful shape and contributes to an effortlessly smooth consistency.
Instructions
- Step 1: Prepare the Cookie CrustCrush about 20 Oreo cookies very finely using a food processor or by placing them in a sealed bag and crushing with a rolling pin. In a medium bowl, combine these fine crumbs with 1/4 cup of melted unsalted butter, mixing thoroughly until evenly coated. Press approximately 1-2 tablespoons of this mixture firmly into the bottom of 8-10 individual serving cups, ramekins, or small mason jars. Place these into the refrigerator to chill for a minimum of 15 minutes, allowing the crust to set. This chilling time is crucial for a stable base.
- Step 2: Make the Chocolate Cream Cheese BaseIn a separate large mixing bowl, beat 8 ounces of softened full-fat cream cheese with 1/2 cup of granulated sugar using an electric mixer on medium speed. Continue mixing until the mixture becomes wonderfully smooth and perfectly creamy, with no lumps visible. Next, carefully incorporate 1/4 cup of unsweetened cocoa powder and 1 teaspoon of pure vanilla powder, beating until all ingredients are fully combined and the chocolate color is uniform throughout. Scrape down the sides of the bowl as needed to ensure everything is well-mixed.
- Step 3: Whip the Heavy CreamUsing another separate, impeccably clean and ideally chilled bowl (a metal bowl works wonders here), pour in 1 ½ cups of very cold heavy cream. Begin whipping the cream with an electric mixer on medium-high speed. Once the cream starts to thicken slightly, gradually add 2 tablespoons of powdered sugar. Continue whipping until beautiful stiff peaks form, meaning the cream holds its shape when the beater is lifted. Be vigilant and avoid overbeating, as this can cause the cream to become grainy or separate.
- Step 4: Fold the Mousse TogetherNow comes the delicate part: combining the two main components. Gently fold about a third of the whipped cream into the chocolate cream cheese mixture. This initial addition helps to lighten the cream cheese base, making it easier to incorporate the rest of the whipped cream without deflating it. Then, very carefully fold in the remaining whipped cream using a rubber spatula, employing a gentle lifting motion, until just combined. The goal is to maintain as much of the whipped cream's airiness as possible, ensuring a light and fluffy mousse.
- Step 5: Assemble the Mousse CupsOnce your mousse is perfectly folded, spoon or pipe the creamy chocolate mousse mixture evenly over the chilled cookie crusts in your prepared serving cups. For a professional finish, you can use a piping bag with a star tip. Crush an additional 5-6 Oreo cookies and generously sprinkle these extra crumbs over the top of each mousse cup. This adds another layer of texture and visual appeal, signalling the deliciousness within.
- Step 6: Chill and ServeThis final step is perhaps the hardest: patience. Refrigerate the assembled Creamy No-Bake Oreo Mousse Cups for a minimum of 2-4 hours. For the absolute best results, allowing them to chill overnight is highly recommended. This extended chilling time permits the mousse to firm up beautifully and allows all the wonderful flavors to meld together perfectly. Serve chilled directly from the cups, ready to delight with every spoonful of this incredibly easy chocolate dessert.
Notes
- Keep these delightful mousse cups covered tightly in the refrigerator for up to 3-4 days to maintain their luscious texture and freshness.
- As a delicate chilled dessert, these mousse cups are not suitable for reheating; they are best enjoyed straight from the refrigerator.
- Elevate your serving by adding a fresh raspberry or a few chocolate shavings on top just before enjoying, for an extra touch of elegance.
- For the fluffiest mousse, ensure your heavy cream is very cold and your mixing bowl is well-chilled before whipping, then fold it gently to maintain maximum airiness.
- Prep Time: 15 minutes
- Cook Time: 20 minutes
- Method: Stovetop
- Cuisine: American
Nutrition
- Serving Size: [1 cup (approx. 200g)]
- Calories: 200g
- Sodium: 80
- Fat: 25
- Saturated Fat: 15
- Trans Fat: 0.5
- Protein: 20
FAQs
How can I ensure my Creamy No-Bake Oreo Mousse Cups set perfectly?
To achieve that perfectly firm yet velvety texture for your Creamy No-Bake Oreo Mousse Cups, chilling time is your best friend! After assembling, pop them into the refrigerator for a minimum of two to three hours. This allows the cream cheese and whipped topping mixture to firm up beautifully, ensuring each bite is a delightful cloud of chocolatey goodness. For an even sturdier result, an overnight chill is never a bad idea, especially if you’re planning a grand reveal at a party. Don’t rush the chill, and your mousse cups will thank you with their impeccable structure and creamy charm!
What makes this an easy chocolate dessert perfect for any occasion?
This delightful Creamy No-Bake Oreo Mousse Cups recipe truly earns its title as an easy chocolate dessert because it skips the oven entirely, saving you from baking woes! The simplicity of crushing cookies, whipping a few ingredients together, and layering them into cups makes it a stress-free project, even for novice dessert makers. It’s fantastic for spontaneous cravings or last-minute potlucks. Plus, the minimal effort yields maximum impact – a stunning, delicious treat that always impresses. Whether it’s a birthday bash, a casual get-together, or just a Tuesday evening treat, its straightforward preparation ensures you can whip up something special without breaking a sweat.
Can I prepare these delightful Creamy No-Bake Oreo Mousse Cups ahead of time for a party?
Absolutely, preparing your delightful Creamy No-Bake Oreo Mousse Cups in advance is not only possible but often recommended! They are a fantastic make-ahead option, perfect for busy hosts. You can assemble them a day or even two before your event. Just make sure to cover them tightly with plastic wrap to prevent any refrigerator odors from mingling with your delicious dessert. Keeping them chilled in the fridge will allow the flavors to meld beautifully and the layers to set firmly, ensuring a show-stopping presentation and an incredibly creamy texture when it’s time to serve.
Are there any dairy-free alternatives for making these Creamy No-Bake Oreo Mousse Cups?
Yes, you can certainly adapt this recipe to create dairy-free Creamy No-Bake Oreo Mousse Cups! Simply swap out the traditional cream cheese for a plant-based cream cheese alternative, widely available in most grocery stores. For the heavy cream, use a full-fat coconut cream (chilled overnight and scooped from the top of the can) or a dairy-free whipped topping. Ensure your Oreo cookies are also dairy-free, as some variations might contain dairy. These simple substitutions will allow everyone to enjoy this incredible chocolate dessert, maintaining its signature creaminess and delightful texture without compromise.