
Waking up to the aroma of a freshly baked treat is pure magic, isn’t it? Forget complicated pastries; this King’s Hawaiian Cheesecake Danish Fluffy & Creamy recipe brings bakery-level bliss right to your kitchen, without the early morning panic. Imagine golden-brown rolls cradling a luscious, creamy cheesecake filling – pure joy in every bite! It’s the kind of delight that turns any regular morning into a special occasion, making you feel like a culinary wizard.
- This recipe simplifies pastry making, effortlessly transforming humble sweet rolls into an impressive, bakery-quality King’s Hawaiian Cheesecake Danish.
- Experience a harmonious blend of sweet, tangy, and rich flavors, creating a truly irresistible and memorable dessert sensation.
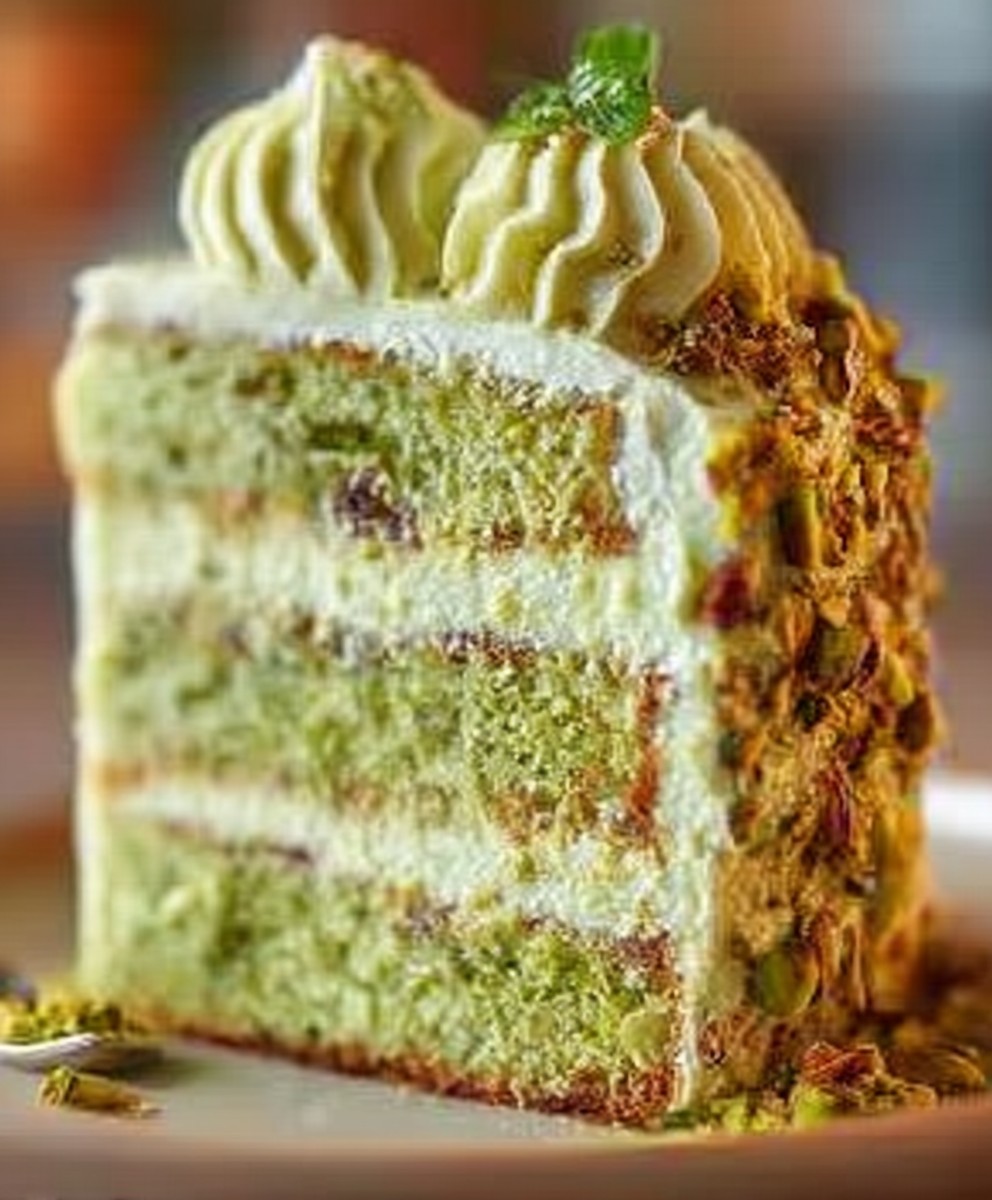
- The stunning golden crust and creamy, swirled center make this Danish a visual masterpiece, perfect for any gathering or special brunch.
- Remarkably versatile, these delightful pastries are ideal for breakfast, dessert, or an elegant afternoon tea, pleasing every palate.
Ingredients for King’s Hawaiian Cheesecake Danish Fluffy & Creamy
Here’s what you’ll need to make this delicious dish:
- King’s Hawaiian Sweet RollsThese soft, fluffy rolls are the foundation, offering a distinct sweetness and incredible texture that elevates the entire Danish. Choose a fresh pack to ensure maximum deliciousness.
- Cream CheeseOpt for full-fat cream cheese, softened to room temperature, which guarantees a smooth, lump-free, and incredibly rich cheesecake filling. Avoid low-fat versions for the best results.
- Granulated SugarThis provides the perfect level of sweetness, balancing the tanginess of the cream cheese and enhancing the overall flavor profile of your King’s Hawaiian Cheesecake Danish.
- Large EggsEggs act as a binder, giving the cheesecake filling its creamy texture and helping it set beautifully during baking. Ensure they are at room temperature.
- Alcohol-Free Vanilla ExtractA dash of good quality alcohol-free vanilla extract is crucial for that classic, comforting cheesecake aroma and flavor that everybody loves. Pure alcohol-free vanilla extract is always recommended.
- Lemon ZestFinely grated lemon zest adds a bright, zesty counterpoint to the richness of the cream cheese, making the Danish feel fresh and vibrant. Don’t skip this flavor booster.
- All-Purpose FlourA small amount of flour helps stabilize the cheesecake filling, preventing cracks and ensuring a perfectly smooth consistency. Sift it for best results.
- Powdered SugarThis fine sugar forms the base of our simple, sweet glaze, dissolving easily to create a silky-smooth finish. Sift before using to avoid lumps.
- Milk or Lemon JuiceA splash of milk thins the powdered sugar into a drizzly glaze, or use lemon juice for an extra tangy kick that complements the cheesecake.
- Optional: Fruit PreservesA spoonful of raspberry or apricot preserves can be swirled into the cheesecake filling for an extra layer of fruit flavor and visual appeal.
The full ingredients list, including measurements, is provided in the recipe card directly below.
How to Make King’s Hawaiian Cheesecake Danish Fluffy & Creamy
Follow these simple steps to prepare this delicious dish:
- Step 1: Prepare Your RollsPreheat your oven to 350°F (175°C). Carefully separate each King’s Hawaiian Sweet Roll, keeping them intact. Arrange them in a single layer on a parchment-lined baking sheet, ensuring a little space between each one for even baking.
- Step 2: Craft the Cheesecake FillingIn a medium bowl, beat the softened cream cheese with granulated sugar until the mixture is incredibly smooth and free of any lumps. Incorporate the large eggs one at a time, mixing well after each addition. Stir in the alcohol-free vanilla extract, lemon zest, and all-purpose flour until just combined. Be careful not to overmix, which can introduce too much air.
- Step 3: Assemble Your DanishUsing a spoon, create a small indentation in the center of each King’s Hawaiian roll, pressing down gently but not all the way through. Spoon a generous dollop of the creamy cheesecake filling into each indentation. If using, carefully add a small swirl of fruit preserves on top of the cheesecake filling.
- Step 4: Bake to Golden PerfectionTransfer the baking sheet to your preheated oven. Bake for 18-22 minutes, or until the edges of the rolls are golden brown and the cheesecake filling is set, with a slight wobble in the center. Let them cool completely on a wire rack before glazing.
- Step 5: Drizzle with GlazeWhile the Danish cools, whisk together the powdered sugar and milk (or lemon juice) in a small bowl until you achieve a smooth, pourable glaze consistency. Once the King’s Hawaiian Cheesecake Danish Fluffy & Creamy pastries are fully cooled, drizzle the glaze generously over each one.
Transfer to plates and enjoy this delightful treat with a warm beverage for the perfect finishing touch.
The Unexpected Genius of King’s Hawaiian Rolls in Baking
Who knew these incredibly soft King’s Hawaiian Sweet Rolls, usually for savory meals, held such sweet potential? This recipe unveils their hidden genius, transforming them into the perfect, fluffy base for our King’s Hawaiian Cheesecake Danish Fluffy & Creamy. Their inherent sweetness and tender texture complement the tangy, rich cheesecake filling beautifully. Traditional Danish dough is demanding, but these ready-to-use rolls offer a brilliant shortcut, saving time and effort without sacrificing gourmet flavor or delightful texture. This innovative approach makes baking accessible, proving the best ingredients are often already in your pantry, waiting for their sweet moment.
A Story of Sweet Inspiration
My discovery of using King’s Hawaiian rolls for a sweet treat was purely accidental. With rolls nearing their date and cream cheese in the fridge, an idea sparked: combine their comfort with cheesecake, bypassing traditional Danish dough fuss. My kitchen became a laboratory. While the first attempt looked rustic, the taste was a revelation! That warm bite of the King’s Hawaiian Cheesecake Danish Fluffy & Creamy, golden outside and creamy inside, cemented its place as a favorite. It’s a testament to kitchen spontaneity, proving that delightful creations often emerge from unexpected pairings and playful experimentation.
Tips for Perfect Danish Texture
To achieve that perfect King’s Hawaiian Cheesecake Danish Fluffy & Creamy, a few smart tips make all the difference. Always ensure your cream cheese is at true room temperature for a smooth, lump-free filling. Beat the cream cheese and sugar until wonderfully smooth before adding eggs. Incorporate eggs one at a time, mixing just until combined to avoid over-aerating. When indenting the rolls, use the back of a spoon to create a well without tearing. Finally, resist overbaking; the filling should still have a slight wobble, setting perfectly upon cooling. These steps ensure a consistently fluffy, creamy, and utterly irresistible result.
Creative Twists and Toppings
While the classic King’s Hawaiian Cheesecake Danish is superb, feel free to customize! Experiment with different fruit preserves like tart cherry or vibrant blueberry. A thin layer of lemon curd can intensify citrus notes. For chocolate lovers, swirl in melted chocolate or sprinkle mini chips. Warm spices such as cinnamon or nutmeg add a cozy touch. Consider a crumble topping of butter, flour, and brown sugar before baking for crunch. Toasted, chopped nuts on the glaze also add sophistication. These adjustments allow you to tailor this versatile King’s Hawaiian Cheesecake Danish to any palate or occasion, making it uniquely yours.
Your New Go-To Brunch Treat
Imagine a leisurely Sunday morning, a platter filled with these stunning King’s Hawaiian Cheesecake Danish Fluffy & Creamy pastries. They’re more than just a dessert; they’re a showstopper that transforms any brunch into an extraordinary event. Unlike time-consuming traditional pastries, these come together easily, allowing you to enjoy your guests. Their visual appeal is immediate: golden rolls, creamy white filling, often adorned with fruit or glaze. They perfectly balance sweet and tangy, rich and light, offering satisfying indulgence without being heavy. Serve them warm or at room temperature; they’re always fantastic. This delightful Danish will quickly become your signature offering, making everyone ask for the recipe.
Keeping Your Danish Fresh
Should you miraculously have any King’s Hawaiian Cheesecake Danish Fluffy & Creamy leftovers, proper storage ensures their continued deliciousness. Once completely cooled, store these pastries in an airtight container in the refrigerator for up to 3-4 days due to the cream cheese filling. For reheating, gently warm them in an oven at 300°F (150°C) for 5-7 minutes to regain that ‘just baked’ warmth, avoiding the microwave. For longer storage, individual cooled Danishes can be tightly wrapped and frozen for up to 1 month. Thaw them overnight in the refrigerator before reheating. Enjoying these again is almost as good as the first time!
Perfecting the Cooking Process

Achieving the perfect King’s Hawaiian Cheesecake Danish starts with a smart sequence. First, soften your cream cheese while the rolls come to room temperature. Then, prepare the luscious cheesecake filling. Finally, assemble the danishes and bake until golden, ensuring a beautifully puffed, creamy delight.
Add Your Touch
Elevate your King’s Hawaiian Cheesecake Danish with exciting variations. Swap lemon zest for orange, or sprinkle a pinch of cardamom into the cream cheese filling. Consider a drizzle of berry coulis post-baking, or a scattering of toasted slivered almonds for added crunch and flavor adventure.
Storing & Reheating
Store leftover King’s Hawaiian Cheesecake Danish in an airtight container in the refrigerator for up to three days. For optimal enjoyment, gently warm them in a preheated oven at 200°F (95°C) for 5-7 minutes. This revives their fluffy texture and creamy center beautifully.
-
Ensure your cream cheese is truly at room temperature. This prevents lumps in your filling, guaranteeing that silky smooth, creamy texture essential for a delightful Danish experience.
-
Do not overmix the cheesecake filling. Overbeating can incorporate too much air, which might cause the filling to puff too much and then crack during baking. Mix until just combined.
-
Press the center of each roll gently but firmly. Creating a good well holds the generous dollop of cream cheese filling perfectly, preventing it from overflowing during baking.
My Aunt Mildred once declared these danishes were “better than her fancy bakery!” Her enthusiastic praise, delivered with a cream cheese smudge on her cheek, truly solidified this recipe’s legendary status in our family.
The Unsung Hero: King’s Hawaiian Cheesecake Danish Fluffy & Creamy
Let’s be honest, mornings can be a bit of a chaotic circus act, especially if you’re trying to conjure up something remotely exciting for breakfast. Cereal? Been there, done that. Toast? Yawn. But what if I told you there’s a way to transform your breakfast or brunch into a moment of pure, unadulterated bliss? A moment so good it might just make you forget about the mountain of laundry or that urgent email. Enter the King’s Hawaiian Cheesecake Danish Fluffy & Creamy. This isn’t just a recipe; it’s a breakfast revolution, a dessert masquerading as an acceptable morning treat, and quite possibly, the easiest path to becoming a household hero.
Picture this: the sweet, slightly savory embrace of a King’s Hawaiian roll, lovingly cradling a cloud-like dollop of rich, tangy cheesecake filling. As it bakes, the roll turns golden brown, puffed and inviting, while the filling sets into a creamy, dreamy center that melts in your mouth. Each bite delivers a symphony of textures and flavors – the soft, airy bread, the smooth, decadent cream cheese, and a hint of vanilla that whispers sweet nothings to your taste buds. It’s elegant enough for a special occasion, yet delightfully simple to whip up on a whim. Trust me, your taste buds are about to send you a very grateful thank-you note.
Why This King’s Hawaiian Cheesecake Danish Will Change Your Life (and Mornings)
Before discovering this gem, my mornings often involved a desperate rummage through the pantry, culminating in a sad piece of toast or, heaven forbid, instant oatmeal. But no more! This King’s Hawaiian Cheesecake Danish Fluffy & Creamy recipe swooped in like a culinary superhero, rescuing me from breakfast monotony. The secret lies in the genius combination of ready-made King’s Hawaiian rolls – those wonderfully soft, slightly sweet pillows of bread – and a ridiculously easy, yet incredibly flavorful, cheesecake filling. Forget complicated pastry doughs or hours spent kneading. This recipe is all about maximum flavor with minimal effort, a concept I like to call “culinary wizardry for the time-strapped.”
Moreover, the versatility of these delightful danishes is simply unmatched. You can serve them warm, fresh from the oven, filling your home with an aroma that’s frankly unfair to anyone still asleep. Or, enjoy them at room temperature, perhaps with a cup of coffee for a sophisticated mid-morning treat. They’re perfect for brunches, potlucks, or simply as a reward for surviving another Tuesday. Prepare yourself for compliments, requests for the recipe, and possibly a few marriage proposals from appreciative family members. Yes, they’re that good. And the best part? You don’t need a pastry chef degree to master them. Just a willingness to embrace deliciousness and a few simple ingredients.
Gather Your Arsenal: Ingredients for Your Fluffy Cheesecake Pastry
To embark on this delightful journey toward King’s Hawaiian Cheesecake Danish Fluffy & Creamy nirvana, you’ll need a few key players. No exotic spices or hard-to-find components here; just straightforward ingredients that pack a punch. We’re aiming for creamy, we’re aiming for fluffy, and we’re definitely aiming for delicious.
For the Decadent Filling:
- 1 (8-ounce) block cream cheese, softened
- ¼ cup granulated sugar
- 1 large egg yolk
- 1 teaspoon pure alcohol-free vanilla extract
- 1 tablespoon fresh lemon juice (or orange juice for a sweeter twist)
For the King’s Hawaiian Danish Base:
- 1 (12-count) package King’s Hawaiian Original Sweet Rolls
- 2 tablespoons unsalted butter, melted
For the Optional Glaze (because everything’s better with a little sparkle):
- ½ cup powdered sugar
- 1-2 tablespoons milk (any kind works)
- ¼ teaspoon pure alcohol-free vanilla extract
You’ll also want a baking sheet lined with parchment paper – a non-negotiable step for easy cleanup and preventing stickage, because nobody wants a danish disaster. Make sure all your ingredients are ready before you begin. Softened cream cheese is your best friend here; cold cream cheese will fight you, creating lumps and an uneven texture in your beautiful filling. Trust the process, trust the room temperature cream cheese, and your King’s Hawaiian Cheesecake Danish will thank you.
Crafting Culinary Magic: Step-by-Step Instructions
Now for the fun part! This is where we turn simple ingredients into a breakfast masterpiece. Get ready to impress yourself and anyone lucky enough to be within sniffing distance of your kitchen. Creating this King’s Hawaiian Cheesecake Danish Fluffy & Creamy treat is much easier than it sounds, almost ridiculously so.
Preparation is Key (and Hilariously Simple)
- Preheat and Prep:Position an oven rack in the middle of your oven and preheat to 350°F (175°C). Line a large baking sheet with parchment paper. This step is crucial for non-stick success!
- Roll Call:Separate the King’s Hawaiian rolls from the package, keeping them intact as individual rolls. Arrange them on your prepared baking sheet, allowing a little space between each one.
- Create the Cozy Nests:Using the back of a spoon or your thumb, gently but firmly press an indentation into the center of each roll. You want to create a little “well” or “nest” for the cheesecake filling to snuggle into. Don’t press all the way through!
Whipping Up the Dreamy Cheesecake Filling
- Cream Cheese Command:In a medium bowl, combine the softened cream cheese and granulated sugar. Beat with an electric mixer on medium speed until completely smooth and creamy, about 1-2 minutes. Scrape down the sides of the bowl to ensure everything is incorporated.
- Egg-cellent Addition:Add the egg yolk, alcohol-free vanilla extract, and lemon juice to the cream cheese mixture. Beat again on low speed until just combined. Be careful not to overmix; we want a luscious, dense filling, not an airy soufflé.
Assembly Line of Deliciousness
- Fill ‘Em Up:Spoon about 1 to 1 ½ tablespoons of the cheesecake filling into the indentation of each King’s Hawaiian roll. Be generous but avoid overfilling; we want the filling to stay put!
- Golden Glow:Brush the exposed bread part of each roll with the melted butter. This helps them achieve that beautiful, irresistible golden brown crust as they bake.
Baking to Perfection
- Bake Away:Transfer the baking sheet to your preheated oven. Bake for 15-18 minutes, or until the rolls are golden brown and the cheesecake filling is set and slightly puffed. The filling might have a slight jiggle in the center, which is perfectly normal.
- Cool Down:Carefully remove the baking sheet from the oven. Let the danishes cool on the baking sheet for about 5-10 minutes before transferring them to a wire rack to cool completely. This allows the filling to firm up properly.
The Grand Finale: Glaze Time (Optional, but Highly Recommended)
- Whisk the Magic:In a small bowl, whisk together the powdered sugar, milk, and alcohol-free vanilla extract until smooth and free of lumps. Adjust the consistency with more milk (for a thinner glaze) or more powdered sugar (for a thicker glaze) as desired.
- Drizzle and Devour:Once the danishes are completely cool, generously drizzle the glaze over each one. Let the glaze set for a few minutes before serving.
And there you have it! A plate of warm, inviting King’s Hawaiian Cheesecake Danish Fluffy & Creamy pastries, ready to elevate any occasion. Don’t be surprised if they disappear faster than you can say “more cheesecake, please!” These creamy Danish delights are a true testament to how simple ingredients can create something extraordinary. Enjoy the sweet, tangy perfection.
Frequently Asked Questions About Your Fluffy Cheesecake Pastry
You’ve got questions, we’ve got answers! Diving into a new recipe can sometimes bring up a few queries, especially when you’re aiming for that perfect King’s Hawaiian Cheesecake Danish Fluffy & Creamy outcome. Here are some of the most common questions I hear about making these delightful pastries.
What if my cream cheese isn’t soft enough?
If you’re in a pinch, cut your cream cheese into smaller cubes and microwave it on low power (e.g., 50% power) for 10-15 second intervals, stirring in between, until it reaches a soft, pliable consistency. Be careful not to melt it!
Can I make these danishes ahead of time?
Absolutely! You can assemble the danishes (with the filling) the night before, cover them lightly, and refrigerate. Just brush with melted butter and bake them fresh in the morning. This ensures a hot, fluffy cheesecake pastry for breakfast.
How can I add fruit to my King’s Hawaiian Cheesecake Danish?
For a fruity twist, you can gently fold a tablespoon of finely diced fresh berries (like blueberries or raspberries) into the cream cheese filling before spooning it into the rolls. Alternatively, top the baked danishes with a fresh fruit compote or a dollop of fruit preserves.
What if I don’t have King’s Hawaiian rolls?
While King’s Hawaiian rolls are truly ideal for their sweetness and texture, you could use other soft, slightly sweet dinner rolls in a pinch. However, the unique flavor profile and fluffiness of King’s Hawaiian rolls really make this specific recipe shine and contribute to the King’s Hawaiian Cheesecake Danish fluffy & creamy experience.
My glaze is too thick/thin. How do I fix it?
If your glaze is too thick, add a tiny splash more milk (half a teaspoon at a time) and whisk until it reaches your desired drizzling consistency. If it’s too thin, whisk in a tablespoon of extra powdered sugar until it thickens up. It’s all about finding that perfect balance for your creamy Danish topping.
A Sweet Conclusion to Your Culinary Adventure
Well, there you have it – the secret to unlocking mornings that feel less like a sprint and more like a leisurely stroll through a sun-drenched meadow, all thanks to the humble yet mighty King’s Hawaiian Cheesecake Danish Fluffy & Creamy. These pastries are more than just a recipe; they are a promise of pure joy, a delightful escape from the mundane, and an undeniable testament to the magic that happens when fluffy bread meets creamy cheesecake. So go forth, bake with abandon, and prepare to bask in the glory of creating something truly spectacular with minimal fuss. Your taste buds, your family, and frankly, your entire morning routine will thank you. Happy baking, fellow dessert enthusiasts!
Conclusion for King’s Hawaiian Cheesecake Danish Fluffy & Creamy
So there you have it, folks! The journey to crafting your own King’s Hawaiian Cheesecake Danish Fluffy & Creamy is not just a recipe; it’s an adventure in deliciousness. We’ve unlocked the secret to transforming humble rolls into a bakery-worthy masterpiece, complete with a filling so rich and fluffy, it’ll make your taste buds sing opera. This delightful treat proves that sometimes, the simplest ingredients can create the most extraordinary results. Whether you’re impressing guests or just treating yourself to a moment of pure bliss, this creamy cheesecake danish is bound to become a beloved favorite. Go forth and bake joyfully!
Print
King’s Hawaiian Cheesecake Danish Fluffy & Creamy
- Total Time: 35 minutes
- Yield: 4 servings
Description
Turn sweet King’s Hawaiian rolls into heavenly danishes! Our Fluffy & Creamy Cheesecake Danish offers a delightful blend of soft, buttery bread and rich, tangy filling.
Ingredients
- King's Hawaiian Sweet Rolls: 12 count
- Cream Cheese: 8 ounces, softened
- Granulated Sugar: 1/2 cup
- Large Egg: 1
- Alcohol-Free Vanilla Extract: 1 teaspoon
- Unsalted Butter: 1/4 cup (4 tablespoons), melted
Instructions
- Step 1: Preheat your oven to 350°F (175°C). Lightly grease a 9×13 inch baking dish. Flatten each King's Hawaiian roll slightly with the palm of your hand or a rolling pin, creating a small indentation in the center, then arrange them in a single layer in the prepared baking dish. Brush the tops of the rolls with the melted butter.
- Step 2: In a medium bowl, beat the softened cream cheese with the granulated sugar until smooth and creamy. Add the large egg and alcohol-free vanilla extract, beating until just combined and smooth. Be careful not to overmix.
- Step 3: Spoon a generous tablespoon of the cheesecake filling into the center indentation of each flattened King's Hawaiian roll. Spread the filling slightly to cover the center area.
- Step 4: Bake for 18-22 minutes, or until the cheesecake filling is set and lightly golden around the edges, and the rolls are puffed and golden brown.
- Step 5: Remove the baking dish from the oven and let the King’s Hawaiian Cheesecake Danish cool for at least 15-20 minutes before serving. Optionally, you can dust with powdered sugar or drizzle with a simple glaze (made from powdered sugar and a touch of milk) before serving warm or at room temperature.
Notes
- Keep any leftover danishes fresh by storing them in an airtight container in the refrigerator for up to 3 days; they're delightful chilled or gently reheated.
- To enjoy a warm Danish again, gently reheat individual portions in a preheated oven at 300°F (150°C) for about 5-7 minutes, or until just warmed through, avoiding the microwave to maintain that lovely roll texture.
- Elevate your danishes by serving them slightly warm, perhaps with a sprinkle of powdered sugar and a side of fresh berries or a light drizzle of honey for an extra touch of sweetness.
- For the fluffiest base and golden finish, remember to generously brush your flattened King's Hawaiian rolls with melted butter before spooning in the creamy filling—it truly enhances their texture and taste.
- Prep Time: 15 minutes
- Cook Time: 20 minutes
- Method: Stovetop
- Cuisine: American
Nutrition
- Serving Size: 1 piece (110g)
- Calories: 380
- Sodium: 280mg
- Fat: 23g
- Saturated Fat: 14g
- Trans Fat: 0.1g
- Protein: 30g
FAQs
Why are King’s Hawaiian rolls perfect for this cheesecake danish?
King’s Hawaiian rolls bring a uniquely soft, slightly sweet, and incredibly fluffy base to these danishes that traditional pastry dough often struggles to match. Their inherent sweetness complements the tangy cheesecake filling beautifully, creating a harmonious flavor profile. Plus, their pre-portioned nature makes assembly an absolute breeze, saving you precious time and effort in the kitchen. It’s like they were destined to cradle a creamy, dreamy cheesecake center, delivering a delightful texture contrast that will have everyone asking for your secret ingredient!
How can I ensure my King’s Hawaiian Cheesecake Danish Fluffy & Creamy is extra decadent?
Achieving that perfect fluffy and creamy texture for your cheesecake filling is all about technique and temperature. Firstly, ensure your cream cheese is at room temperature; this prevents lumps and allows for smooth incorporation. Beat the cream cheese alone until it’s super smooth and airy before adding sugar and other ingredients. Don’t overmix once you add the eggs, as this can introduce too much air and lead to cracks. Gentle mixing is key for a truly luscious and velvety texture that melts in your mouth with every bite, making your King’s Hawaiian Cheesecake Danish truly decadent.
Can I prepare King’s Hawaiian Cheesecake Danish Fluffy & Creamy ahead of time?
Absolutely, you can definitely prepare your King’s Hawaiian Cheesecake Danish Fluffy & Creamy ahead of time to make your life easier! You can assemble the danishes and store them unbaked in the refrigerator for up to 24 hours. Just cover them loosely with plastic wrap. When you’re ready to bake, simply pop them directly into the preheated oven, adding a few extra minutes to the baking time if they are very cold. This make-ahead option is fantastic for entertaining or when you crave a freshly baked treat without the morning rush, delivering fluffy and creamy goodness on demand.
What are some creative topping ideas for these delightful cheesecake danishes?
While the classic is divine, you can elevate your King’s Hawaiian Cheesecake Danish Fluffy & Creamy with various creative toppings! A simple dusting of powdered sugar is always elegant. For fruit lovers, a spoonful of berry compote (made with fresh or frozen berries and a touch of sugar, perhaps thickened with pectin or cornstarch) adds a lovely tart counterpoint. A drizzle of homemade caramel or a sprinkle of toasted chopped nuts, like pecans or almonds, can introduce wonderful textural complexity and rich flavor. Get adventurous and let your taste buds guide you!

Leave a Comment