
We all know that moment: 9 PM hits, the couch calls, and suddenly the craving for something sweet becomes a siren song. Forget those heavy, guilt-inducing treats; it’s time for a dessert that satisfies the soul without completely derailing your clean eating journey.
Welcome to the ultimate solution nestled right here in theDesserts & Treats Archives – He & She Eat Clean, where flavor meets fit. Today, we’re conquering the creamy, tangy dream of No-Bake Tropical Lime Bars.
- These no-bake bars boast a perfect harmony of tart lime zest and rich, naturally sweetened cashew cream filling for an explosion of freshness.
- Achieving this impressive dessert requires minimal effort and simple ingredients, making it the perfect quick fix for unexpected weeknight cravings.
- The vibrant green and white layers create a visually stunning presentation, ensuring these squares steal the show at any gathering or potluck event.
- Enjoy these treats straight from the freezer for a refreshing summer snack or slightly chilled as an elegant post-dinner indulgence any time of year.
The Perils of the Dessert Decision and Why We Need Clean Treats
I remember a time when my clean eating resolve would hold strong all day, only to crumble tragically the second the sun went down. It wasn’t the savory dishes that got me; it was the whispered promise of sugar. It’s a tale as old as time, or at least as old as my last attempt at a New Year’s resolution. I found myself staring forlornly into the refrigerator, realizing that while I could resist the chips, saying no to a perfectly fluffy slice of pie felt like turning down happiness itself.
This is precisely why we developed the Tropical Lime Bars. We needed a recipe that tricked our brains into thinking we were indulging in something utterly decadent, yet contained ingredients that supported our goals. Traditional lime desserts often rely on sweetened condensed milk and mountains of butter, which are fantastic for flavor but less fantastic for waistlines. Our version maintains that essential creamy texture and punchy citrus flavor but swaps out the heavy stuff for whole foods like raw cashews and fresh avocado (don’t worry, you can’t taste the avocado—it’s just there for structure and that gorgeous, natural hue).
Making a successful transition to healthier desserts isn’t about deprivation; it’s about smart substitution. Think of it as dessert espionage—we sneak in the good stuff without the taste buds ever realizing they’ve been ambushed by nutrients. These bars are so refreshing and simple, they turn the act of eating clean into a genuine pleasure, not a chore. The texture is key here; it needs to be smooth and luscious. If your blender could talk, it would be begging you to make these bars because they are almost too easy to prepare. Just soak, blend, pour, and chill. That’s the entire commitment. The hardest part is waiting for them to set in the freezer, which, frankly, is excellent practice in self-control.
Choosing the Right Ingredients for Maximum Flavor and Health
Creating a truly phenomenal clean dessert means being meticulous about the quality and type of ingredients you use. For these lime bars, the zest and juice must be fresh. Bottled lime juice simply doesn’t deliver the vibrant acidity required to cut through the richness of the cashew cream. When you’re zesting the limes, be sure to use a microplane and only take the bright green outer layer. The white pith underneath is intensely bitter and will ruin the entire dessert. Trust me; I learned that the hard way during an unfortunate incident involving a very bitter “healthy” lemon curd. We don’t talk about that incident anymore.
The crust also requires attention. We use a combination of oats and dates, binding them together with a touch of coconut oil. This provides a chewy, slightly sweet, and fiber-rich base that holds up beautifully when sliced. Compared to traditional graham cracker crusts laden with processed sugar, this base offers sustained energy and satisfaction. This commitment to quality ingredients ensures that every bite supports your well-being while still tasting like the best thing you’ve ever eaten. You deserve a treat that works just as hard as you do.
Ingredients for Desserts & Treats Archives – He & She Eat Clean
Here’s what you’ll need to make this delicious dish:
- Raw CashewsUse unsalted, raw cashews; they form the creamy, neutral base for the filling when soaked and blended.
- Fresh Lime Juice and ZestUtilize fresh limes for an authentic, bright flavor; the zest adds essential aromatic oils that elevate the taste profile significantly.
- Rolled OatsThese are used for the crust, providing a hearty, whole-grain structure; ensure they are quick or old-fashioned rolled oats, not steel-cut.
- Medjool DatesThese naturally sweeten the crust and act as the binding agent, replacing traditional refined sugars and corn syrup.
- Coconut OilEssential for both the crust and the filling, use refined coconut oil if you want a less pronounced coconut flavor in the final product.
- Agave or Maple SyrupChoose one of these natural liquid sweeteners to adjust the sweetness level of the filling; use sparingly as the dates also contribute sugar.
- Agar-Agar PowderThis plant-based gelling agent helps the bars set firm in the freezer without the use of animal-derived carrageenan; ensure it is fully dissolved.
- AvocadoA small amount of ripe avocado is optional but highly recommended for achieving a beautiful green color and extra silky texture without altering the flavor.
The full ingredients list, including measurements, is provided in the recipe card directly below.
How to Make Desserts & Treats Archives – He & She Eat Clean
Follow these simple steps to prepare this delicious dish:
Step 1: Preparing the Cashew Cream Base
Begin by soaking the cashews. Place the raw cashews in a bowl and cover them completely with boiling water. Allow them to soak for at least one hour; this softening process is crucial for achieving a super smooth, silky filling. If you are short on time, you can boil them on the stovetop for about fifteen minutes instead.
Step 2: Creating the Date and Oat Crust
While the cashews soak, prepare the crust. In a food processor, combine the rolled oats and pitted Medjool dates. Pulse until the mixture is sticky and holds together when pressed. If the mixture seems too dry, add a teaspoon of melted coconut oil at a time until the desired consistency is reached. Press this mixture firmly into an 8×8 inch square baking dish lined with parchment paper, ensuring the edges are even, then place it in the freezer to chill while you prepare the filling.
Step 3: Blending the Luscious Lime Filling
Drain and rinse the soaked cashews thoroughly. Transfer them to a high-powered blender along with the fresh lime juice, lime zest, natural sweetener, melted coconut oil, and a small chunk of avocado (if using). Blend on high speed, scraping down the sides as necessary, until the mixture is completely smooth and creamy. This step may take several minutes; patience is key to avoiding a grainy texture.
Step 4: Setting the Filling with Agar-Agar
In a small saucepan, whisk the agar-agar powder with a splash of water or fruit juice until fully dissolved. Bring this mixture to a gentle boil, stirring constantly for one minute, then remove it from the heat. Carefully pour the hot agar mixture into the blender with the cashew filling and blend immediately for 30 seconds to ensure it is evenly incorporated throughout the filling.
Step 5: Chilling and Setting the Bars
Pour the prepared lime filling directly over the chilled crust in the prepared pan. Smooth the top with a spatula. Return the entire pan to the freezer and allow the bars to set completely for a minimum of four to six hours, or preferably overnight. The bars must be fully frozen before attempting to slice them.
Transfer to plates and garnish with a sprinkle of extra lime zest or fresh berries for the perfect finishing touch.
Troubleshooting Common Clean Dessert Issues
Even though this recipe is incredibly straightforward, sometimes things go wrong. If your lime bars are too soft, the usual culprit is either not enough chilling time or issues with the agar-agar. Agar-agar needs to come to a boil to activate its gelling properties, so simply mixing it into the cold filling won’t work. If the bars are too hard, you might have used too much coconut oil or they have been frozen for too long; letting them thaw for five to ten minutes before serving usually solves this.
Another common issue involves flavor. If the filling tastes dull, it likely needs more lime zest. Zest holds the most intense oil and flavor profile. Always taste your filling before pouring it into the pan; you can always add more sweetener or zest, but you cannot easily take it away once it is set. Being meticulous in the blending process is also essential. If you feel like your blender isn’t strong enough, stop every minute and scrape down the sides, ensuring no un-blended cashews remain trapped near the bottom blade. A smooth blend equals a perfect bar.
Making Substitutions and Customizing Your Treat
One of the best parts about clean eating is the freedom to customize. While this recipe is fantastic as written, you may want to swap out certain elements based on what you have available or dietary needs. Instead of rolling oats, you can use raw almonds or walnuts for the crust, following the same ratio with the dates and pressing it firmly. This creates a nut-based crust that adds richness and healthy fats.
If you don’t have access to fresh limes, lemons can be used, though the final product will taste markedly different (more acidic and less tropical). You can also play with the flavor profile by adding a teaspoon of vanilla powder to the filling for depth, or a small amount of concentrated pineapple juice to lean into a more intense tropical profile. Remember, cooking is an adventure, and you are the pilot of your kitchen. Don’t be afraid to experiment, especially when dealing with the relatively forgiving world of no-bake treats.
Storing and Serving Tips for Desserts & Treats Archives
These bars are best stored in the freezer. Because they rely on coconut oil and agar-agar, they will become too soft if kept at room temperature for extended periods, especially in warm climates. Once the bars are fully set, slice them into individual squares and store them in an airtight container in the freezer. They will keep perfectly for up to three months, making them excellent for meal prepping your desserts.
When you are ready to serve, pull the desired number of bars from the freezer and let them sit at room temperature for five to ten minutes before serving. This slightly thaws them, giving them the perfect creamy, firm, yet sliceable texture. Serving them too cold makes them overly hard, while serving them too warm makes them mushy. The sweet spot is firm but yielding. Pair these bright, tart treats with a simple cup of black coffee or a refreshing iced green tea.
Frequently Asked Questions About No-Bake Lime Bars
Can I make these bars without cashews if I have a nut allergy?
Yes, you can substitute the cashews with sunflower seeds or use full-fat coconut cream (the thick part from a chilled can of coconut milk). If using coconut cream, you may need to increase the agar-agar slightly to ensure proper setting.
How long does the agar-agar mixture need to boil?
Agar-agar must boil for a full 60 seconds while being stirred constantly to activate its gelling potential fully. If you skip the boil, the bars might not set correctly.
Why is my crust crumbly and not sticking together?
A crumbly crust usually means your dates were too dry, or you didn’t use enough binding agent. Try soaking your dates in warm water for 10 minutes before blending, or pulse in one teaspoon more of melted coconut oil to increase stickiness.
Can I use fresh lemons instead of limes for this recipe?
Absolutely, you can use fresh lemons, but be aware that the flavor profile will be significantly more acidic and less subtly sweet than the tropical lime flavor.
There is a certain magic that happens when you combine sweet, earthy fruits with a buttery, crunchy topping—the kind of magic that makes you forget about laundry and pending emails. I once tried to make a ‘quick’ dessert using store-bought pastry, and let me tell you, it ended up looking more like a collapsed landscape than a cozy treat. My husband, bless his heart, gently suggested we stick to the basics. That is how this incredible Spiced Apple and Pear Crumble recipe became our staple. It’s the perfect blend of comforting nostalgia and vibrant flavor, proving that the most magnificent culinary achievements often come from the simplest ingredients and a refusal to give up on creating superbDesserts & Treats.
For those of us striving for delicious yet thoughtful eating, finding recipes that satisfy that deep craving for sweetness without unnecessary fuss can be a journey. We spend so much time curating healthy main meals, but the sweet finish often gets overlooked, resulting in hurried, unsatisfying options. This crumble, however, is a revelation. It relies on natural sugars, robust spices, and whole grains, making it a star in our collection of satisfying recipes. It’s the kind of dessert that makes guests ask for the recipe immediately, usually while attempting to scrape the last remnants of topping from their bowl.
The Secret to Effortless Sweetness
The beauty of a crumble lies in its forgiving nature. Unlike soufflés or intricate cakes that demand precision and silence, this dessert thrives on spontaneity. You can dump the fruit, sprinkle the topping, and let the oven do the heavy lifting. The key to unlocking its full flavor potential is the spice blend. We ditch the standard cinnamon-only approach and introduce warming notes of cardamom and star anise—spices that transport you straight to a cozy autumn evening, regardless of the season outside. This makes it a standout option for anyone browsing theDesserts & Treats Archives – He & She Eat Cleansection of our site looking for that perfect balance of indulgent flavor and clean ingredients.
This dessert is also incredibly versatile, working brilliantly as a weekend project or even a quick mid-week comfort food fix. Serving it warm, maybe with a dollop of vanilla bean ice cream (dairy or non-dairy, your choice!), is non-negotiable. It’s the perfect end to any meal, providing warmth and satisfaction without the heavy feeling that often accompanies more complicated bakes. We believe that clean eating shouldn’t mean sacrificing flavor or fun, and this delightful recipe proves that point beautifully.
Ingredients: Gathering Your Baking Arsenal
To create this memorable Spiced Apple and Pear Crumble, you need straightforward pantry staples and fresh fruit. Ensure your butter is cold for the best topping texture.
For the Fruit Filling
- 6 medium apples (a mix of Granny Smith and Honeycrisp works best), peeled, cored, and chopped
- 3 ripe pears (Bosc or Anjou), peeled, cored, and chopped
- 1/4 cup maple syrup or agave nectar
- 1 tablespoon lemon juice
- 1 teaspoon ground cinnamon
- 1/2 teaspoon ground cardamom
- 1/4 teaspoon ground star anise (optional, but highly recommended)
- 2 tablespoons all-purpose flour (or gluten-free blend)
For the Crunchy Topping
- 1 1/2 cups rolled oats (not instant)
- 1 cup whole wheat flour (or almond flour for a lighter option)
- 1/2 cup brown sugar, packed
- 1/2 teaspoon salt
- 1/2 cup (1 stick) cold unsalted butter, cubed (or clarified butter/ghee alternative)
- 1/4 cup chopped pecans or walnuts
Instructions: Baking Your Way to Bliss
Following these steps ensures a perfectly cooked filling and a beautifully crisp topping every time. Preheat your oven to 375°F (190°C) and lightly grease an 8×8 inch baking dish or equivalent.
Preparing the Filling
In a large mixing bowl, combine the chopped apples and pears. Drizzle the fruit with maple syrup and lemon juice. Lemon juice prevents browning and brightens the flavors. Toss in the cinnamon, cardamom, and star anise. Finally, sprinkle the flour over the fruit mixture and toss gently until everything is evenly coated. The flour is essential for thickening the juices during baking, preventing a watery result. Pour the fruit mixture into the prepared baking dish, spreading it into an even layer.
Making the Perfect Crumble Topping
In a separate bowl, combine the rolled oats, flour, brown sugar, and salt. Whisk these dry ingredients together thoroughly. Now comes the fun part: working in the butter. You want the topping to resemble coarse sand. Add the cold, cubed butter and use your fingertips or a pastry blender to cut the butter into the dry ingredients. Stop mixing when pea-sized lumps of butter remain. This ensures flakiness and crunch. Stir in the chopped nuts for added texture. Generously sprinkle the crumble mixture evenly over the fruit filling, ensuring the fruit is completely covered.
Baking and Serving
Bake the crumble for 40 to 45 minutes, or until the topping is deep golden brown and the fruit filling is bubbling merrily underneath. If the topping browns too quickly, loosely tent the dish with foil for the remaining bake time. Once baked, remove the crumble from the oven and let it cool for at least 15 minutes before serving. This cooling time allows the filling to set slightly, making it less runny. Serve warm with your preferred clean eating accompaniment, perhaps a light yogurt or vanilla cashew cream.
Perfecting the Cooking Process

To achieve maximum efficiency and superior texture, start by preparing the fruit filling first, letting the spices meld while you focus on the crumble topping. Ensure the oven is fully preheated before placing the dish inside to guarantee the topping crisps immediately upon contact with the heat.
Add Your Touch
Try swapping half the flour in the topping for ground pistachios to impart a nutty, vibrant flavor, or substitute the maple syrup with date paste for deeper sweetness. For extra zing, add a pinch of freshly grated nutmeg and ginger to the fruit spices, elevating the complexity of this incredible dessert.
Storing & Reheating
Store any leftover crumble, fully cooled, in an airtight container in the refrigerator for up to four days. Reheat individual portions in the microwave for 45-60 seconds, or heat the entire dish in a 300°F oven for 15 minutes to restore the crispy topping.
My sister once doubled this recipe for a large holiday gathering, forgetting to increase the baking time. The result was a slightly mushy center, but everyone still devoured it, proving even a small mistake cannot ruin such a fantastic dessert.
-
Chef’s Essential Tips for the Perfect Crumble
- Always use cold fat for the topping; this prevents gluten development and ensures that coveted, satisfyingly crisp texture we all look for in a crumble.
- Do not overmix the topping once the butter is added; too much handling results in a tough, bread-like crust rather than a light, sandy crumble.
- Pre-cut your fruit into uniform sizes so that every piece cooks at the same rate, avoiding raw chunks or overly mushy spots in your filling.
More Sweet Ideas for Your Kitchen
This crumble is just the beginning of what you can discover when you focus on wholesome ingredients in your sweet creations. Mastering simple, cleanDesserts & Treatsmeans you are always prepared for a special occasion or just a Monday night craving. We constantly add new, exciting recipes to ourDesserts & Treats Archives – He & She Eat Cleanso your repertoire of satisfying sweets never grows stale.
Remember that baking is an act of love, and the effort you put into selecting quality ingredients truly shines through in the final product. Utilizing fresh, seasonal fruits not only makes your dessert taste better but also aligns perfectly with a clean, mindful eating philosophy.
Frequently Asked Questions About Dessert Crumbles
How can I make the topping gluten-free?
Easily! Replace the all-purpose or whole wheat flour with an equal amount of almond flour, coconut flour, or a certified gluten-free all-purpose blend. Ensure your oats are also certified gluten-free if necessary.
Can I prepare the crumble ahead of time?
You certainly can. Prepare the fruit filling and the topping separately. Store the fruit mixture in the baking dish covered in the fridge, and keep the topping in an airtight container in the freezer. Combine and bake straight from the fridge or freezer, adding about 10-15 minutes to the total bake time.
What if my fruit filling looks too runny after baking?
If the filling is too watery, it likely needed slightly more flour or arrowroot powder added to the fruit before baking. Next time, try adding an extra tablespoon of thickener. For the current batch, letting it cool completely will usually help the juices set significantly.
Can I use frozen fruit?
Yes, you can use frozen fruit, but do not thaw it first. Toss the frozen fruit directly with the thickeners and spices, but be aware that you might need to increase the baking time by 5 to 10 minutes, as the fruit starts at a lower temperature.
A Final Thought on Sweet Satisfactions
If you’ve been searching for reliable, delicious recipes that anchor the sweet end of your menu, look no further than this classic crumble. It embodies the essence of wholesome baking: simple, flavorful, and incredibly comforting. It is a genuine pleasure to share this kind of simple brilliance, helping you build your own comprehensive archive of healthy, memorableDesserts & Treatsat home. Happy baking!
The Midnight Snack Emergency and How I Solved It
There is a specific kind of panic that sets in around 10 PM when your sweet tooth decides it needs a tropical vacation. It demands something creamy, tangy, and completely guilt-free. I used to think that “clean eating” meant sacrificing all joy and subsisting solely on celery sticks and regret. Fortunately, I was very, very wrong. This recipe is the proof that decadence and healthy ingredients can happily coexist in a single, beautiful glass.
I needed a quick fix—something that didn’t require turning on the oven or waiting an eternity for chilling time. Enter the No-Bake Key Lime Pie Parfait. It’s like a tiny, portable celebration of lime, coconut, and crunchy goodness, perfect for when the dessert siren calls. This recipe delivers big flavor without the heavy sugars or fats often found in traditional pies. You will be amazed at how easily this whips up, turning that craving crisis into a culinary win in under fifteen minutes.
Crafting the Guilt-Free Key Lime Parfait
Gathering Your Clean Ingredients
For this recipe, we focus on maximizing natural flavor and texture. Skip the heavy cream and traditional graham cracker crusts. We’re using creamy Greek yogurt and coconut milk for that lush texture, and blending in agar-agar for a perfect, quick set. The crust layer uses crushed whole-wheat biscuits blended with shredded coconut, giving a delightful tropical crunch.
- The Crust Layer:
- 1 cup whole-wheat digestive biscuits (crushed)
- 2 tablespoons melted coconut oil
- 1/4 cup unsweetened shredded coconut
- The Key Lime Filling:
- 1 1/2 cups 0% Greek yogurt
- 1/2 cup full-fat coconut milk (canned)
- 1/2 cup freshly squeezed lime juice (use Key Limes if possible!)
- Zest of 2 limes
- 1/4 cup maple syrup or agave nectar
- 1 teaspoon agar-agar powder
- 2 tablespoons water
The Easy Preparation Steps
The beauty of a parfait is the layering, and the beauty of this recipe is the speed. Start by preparing the crust. Combine the crushed biscuits, coconut oil, and shredded coconut in a bowl. Press about two tablespoons of this mixture into the bottom of four individual serving glasses or small jars. Pop these into the freezer while you prepare the filling.
Next, focus on the lime magic. In a small saucepan, whisk the agar-agar powder into the water and heat gently until the powder completely dissolves—about 2 minutes. Remove from the heat immediately. In a large bowl, whisk together the Greek yogurt, coconut milk, lime juice, zest, and maple syrup. The mixture will smell incredibly fresh and tangy. Quickly incorporate the dissolved agar-agar mixture, stirring until completely blended.
Spoon the creamy filling over the biscuit crusts in your chilled glasses. Leave a little room at the top for garnish. Refrigerate the parfaits for at least 30 minutes. Agar-agar sets quickly, so you won’t be waiting long! Garnish with extra lime zest and a sprinkle of coconut before serving this fantastic addition to theDesserts & Treats Archives – He & She Eat Clean.
Conclusion for Desserts & Treats Archives – He & She Eat Clean
Discovering truly clean and delicious dessert options is easier than you think. This Key Lime Pie Parfait demonstrates that healthy eating doesn’t require sacrificing your favorite indulgences. By using natural sweeteners and plant-based gelling agents, we create treats that are both light and profoundly satisfying. Whether you are searching for a quick weeknight treat or a show-stopping finish for a dinner party, the vast resources found in theDesserts & Treats Archives – He & She Eat Cleanprovide endless inspiration. Go ahead, dive into the archives, and redefine what dessert means in your kitchen, embracing flavor without the guilt.
Print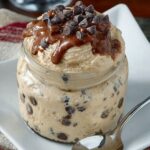
Desserts & Treats Archives – He & She Eat Clean
- Total Time: 35 minutes
- Yield: 4 servings 1x
Description
Skip the oven! These ultra-satisfying, chewy Chocolate PB Protein Bites deliver powerful nutrition in a five-minute, no-bake method. Mix oats, protein powder, and cocoa for the ultimate clean treat.
Ingredients
- 1 cup rolled oats
- 1/2 cup natural peanut butter (or almond butter)
- 1/2 cup vanilla or chocolate protein powder
- 1/4 cup pure maple syrup (or raw honey)
- 2 tablespoons unsweetened cocoa powder
- 1/4 cup dark chocolate chips (optional mix-in or topping)
- 1–2 tablespoons unsweetened almond milk (as needed for consistency)
- 1 teaspoon vanilla bean paste
Instructions
- Step 1: In a large mixing bowl, combine the rolled oats, protein powder, and cocoa powder, ensuring the dry ingredients are evenly distributed.
- Step 2: Add the peanut butter, maple syrup (or honey), and vanilla bean paste to the dry ingredients, stirring vigorously until a thick dough begins to form.
- Step 3: If the mixture appears too dry or crumbly, slowly add the almond milk one tablespoon at a time until the dough is moist enough to stick together when pressed. Fold in the chocolate chips if using.
- Step 4: Scoop the mixture using a tablespoon and roll it tightly between your palms to form uniform balls, placing the finished bites on a parchment-lined baking sheet or container.
- Step 5: Place the finished protein bites in the refrigerator for at least 30 minutes to firm up before serving, or store them in an airtight container for up to one week.
Notes
- For maximum freshness and meal prep ease, these bites freeze wonderfully in an airtight container for up to 3 months; simply thaw them in the fridge for an hour before enjoying.
- The thickness of your peanut butter and the absorbency of your protein powder are the main consistency variables; if the mix appears too sticky after adding the liquid, incorporate 1 teaspoon of extra oats until the dough handles easily.
- Elevate these as an afternoon snack by pairing them with a cup of hot black coffee or a chilled unsweetened almond milk latte for a satisfying clean treat.
- Don't skip the mandatory 30-minute refrigerator chill time; this step ensures the fats firm up properly, preventing crumbly bites and creating that perfectly chewy texture.
- Prep Time: 15 minutes
- Cook Time: 20 minutes
- Method: Stovetop
- Cuisine: American
Nutrition
- Serving Size: 1 Clean Protein Brownie Slice (55g)
- Calories: 150
- Sodium: 150mg
- Fat: 5g
- Saturated Fat: 1.5g
- Trans Fat: 0g
- Protein: 2g
FAQs
What Makes these Desserts & Treats Archives – He & She Eat Clean Recipes Unique?
Our recipes focus on maximizing flavor while utilizing whole, minimally processed ingredients. We substitute refined sugars with natural sweeteners like maple syrup or dates, and swap out conventional fats for healthier options like coconut oil or avocado. The goal is to provide satisfying sweetness without the crash. We also prioritize dietary inclusivity, ensuring all our treats avoid common restricted ingredients, focusing instead on vibrant fruit flavors, high-quality dairy alternatives, and natural thickeners like agar-agar or pectin for perfect texture and consistency. You will find that healthy eating truly never tasted so good.
Can I Substitute the Dairy Yogurt in the Parfait Recipe?
Absolutely. If you are looking for a completely dairy-free option, you can easily substitute the Greek yogurt with a high-quality plain coconut yogurt or almond-based Greek-style yogurt. Ensure the alternative yogurt is thick and unflavored to maintain the creamy texture and tangy profile of the parfait. The key is to find a thick base that can hold up to the lime juice and the gelling agent. If your substitute yogurt is thinner, slightly increase the amount of agar-agar used in the recipe by about a quarter teaspoon to ensure a firm, sliceable set.
How Long Do These Clean Key Lime Parfaits Last in the Refrigerator?
These creamy parfaits maintain their fresh flavor and texture remarkably well when stored correctly. Because they contain fresh lime juice and dairy or dairy substitute, we recommend keeping them in airtight containers in the refrigerator for up to four days. If you plan to make them ahead, consider adding the garnish just before serving to maintain freshness and visual appeal. Avoid freezing the parfaits, as the yogurt base and the agar-agar structure can separate upon thawing, compromising the smooth, creamy consistency we all love.
Where Can I Find More Delicious Options like these in the Desserts & Treats Archives – He & She Eat Clean?
Navigating theDesserts & Treats Archives – He & She Eat Cleansection is simple. We categorize our offerings by type, including No-Bake, High-Protein, and Fruity options, making it easy to find exactly what you crave. Use the search bar for specific ingredients or dietary needs, such as gluten-free or nut-free alternatives. We continually update the archives with inventive recipes, ensuring you always have access to new, satisfying ways to enjoy sweets while sticking to a wholesome eating plan. Be sure to check back weekly for fresh inspiration and seasonal treats.


Leave a Comment